Application Challenge
Overview
Application Challenges evaluate a candidate's ability to build or modify multi-file projects using modern frameworks and technologies. These challenges focus on architectural decisions, UI implementation, and API development.
Configuration Process
Creating an Application challenge follows a structured workflow to define the project type, metadata, and technical stack.
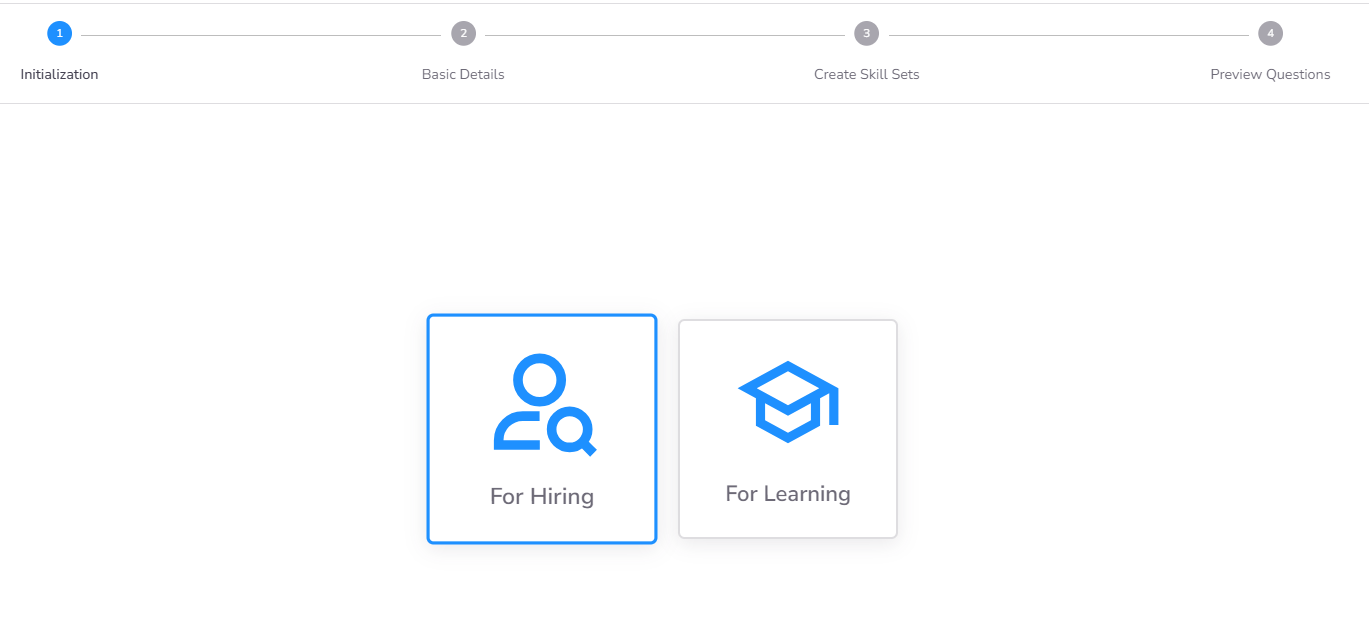
Step 1: Define Purpose
Determine the primary objective of the challenge:
- Hiring Purpose: Used in Assessments and Contests to evaluate external candidates.
- Learning Purpose: Used in Courses for internal employee upskilling and knowledge validation.
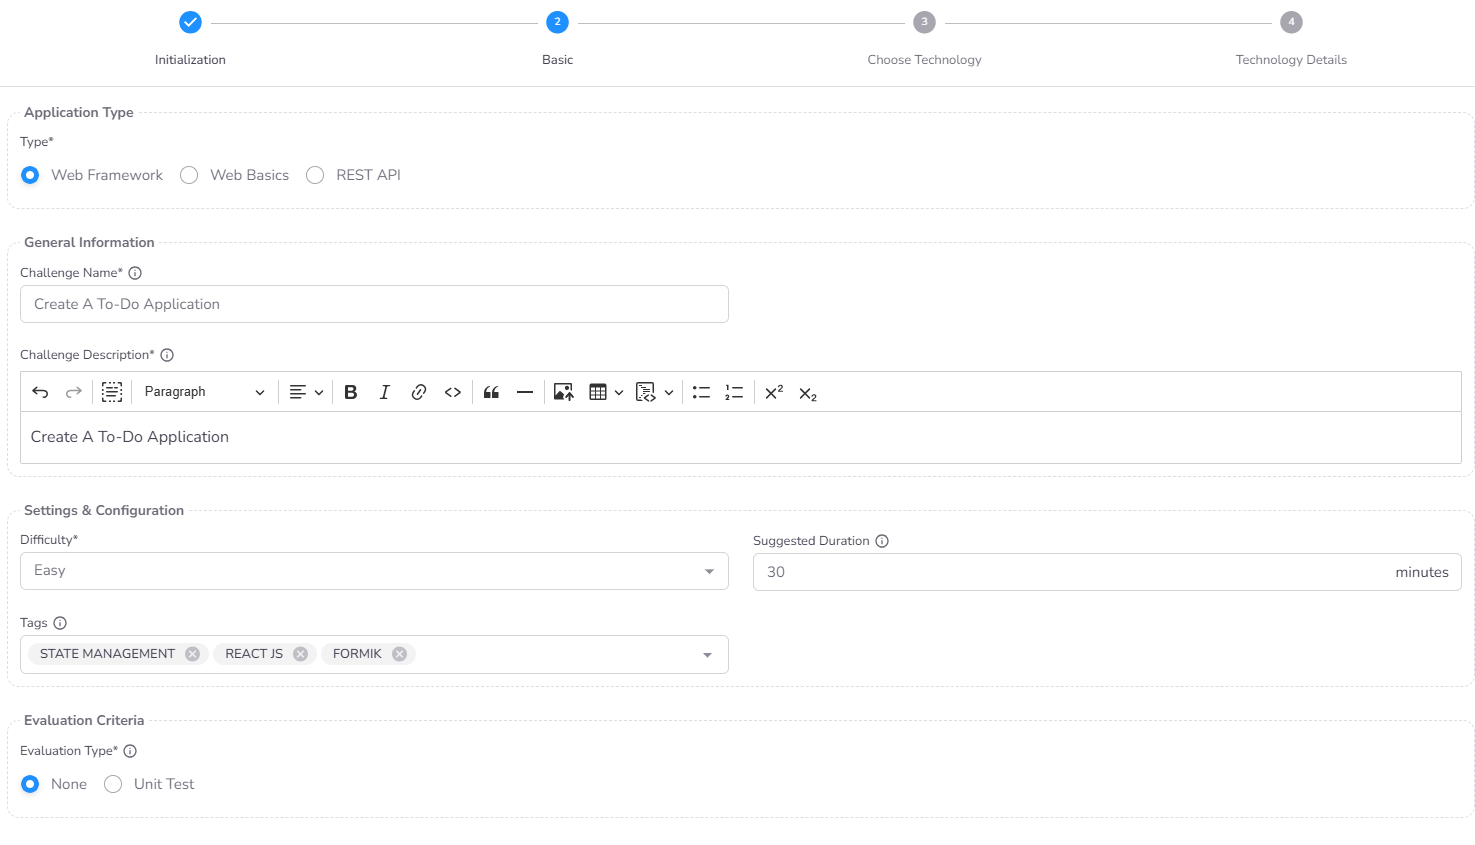
Step 2: Basic Details & Application Type
In this step, you define the core properties and the specific nature of the application:
- Application Type: Select the technical focus of the challenge:
- Web Framework: For modern projects using React, Angular, Next.js, etc.
- Web Basics: For core HTML, CSS, and vanilla JavaScript tasks.
- REST API: For server-side tasks using frameworks like Express, FastAPI, or Flask.
- Challenge Metadata: Provide the Name, Description, Difficulty, Duration, and Tags.
- Evaluation Type: Determine how the challenge is scored. You can select Unit Test for automated evaluation or None for a manual review process. Note that even with manual evaluation, AI Scoring remains available if enabled in the Stage Settings during assessment configuration.
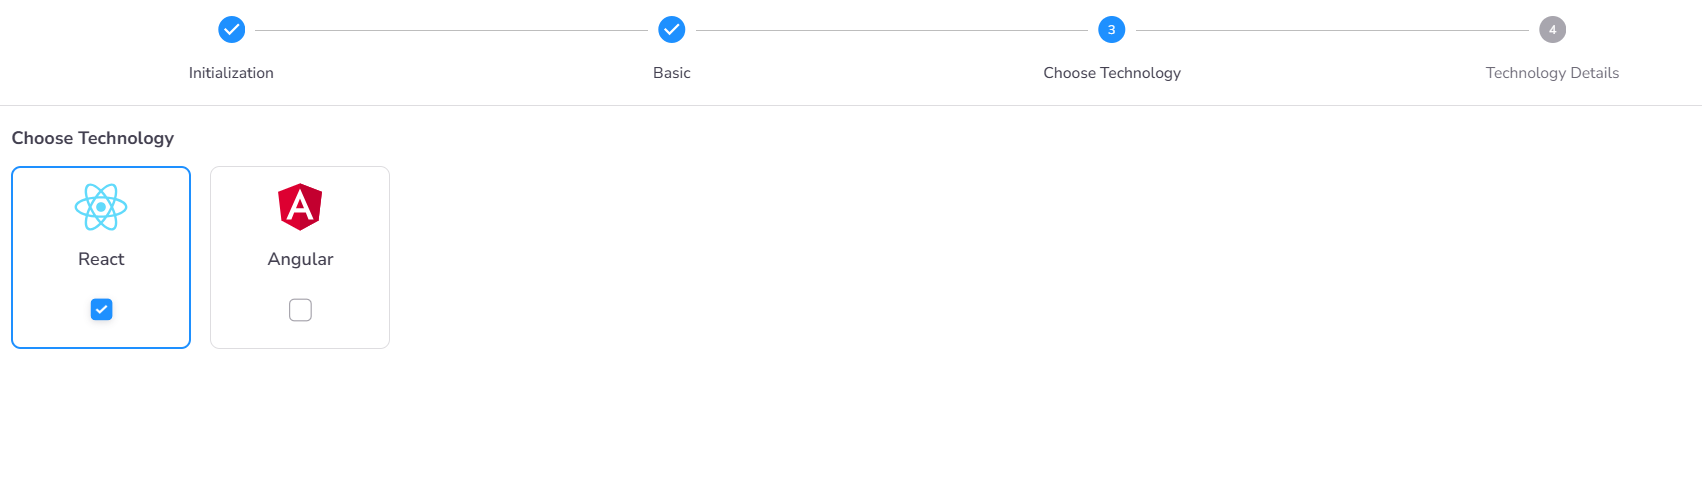
Step 3: Technology Selection
Based on the Application Type selected, choose the specific technologies, frameworks, or libraries supported by the challenge. If the challenge is specialized for a single technology (e.g., React but not Angular), select only that option. For technology-agnostic challenges, you can enable all supported options to provide candidates with maximum flexibility.
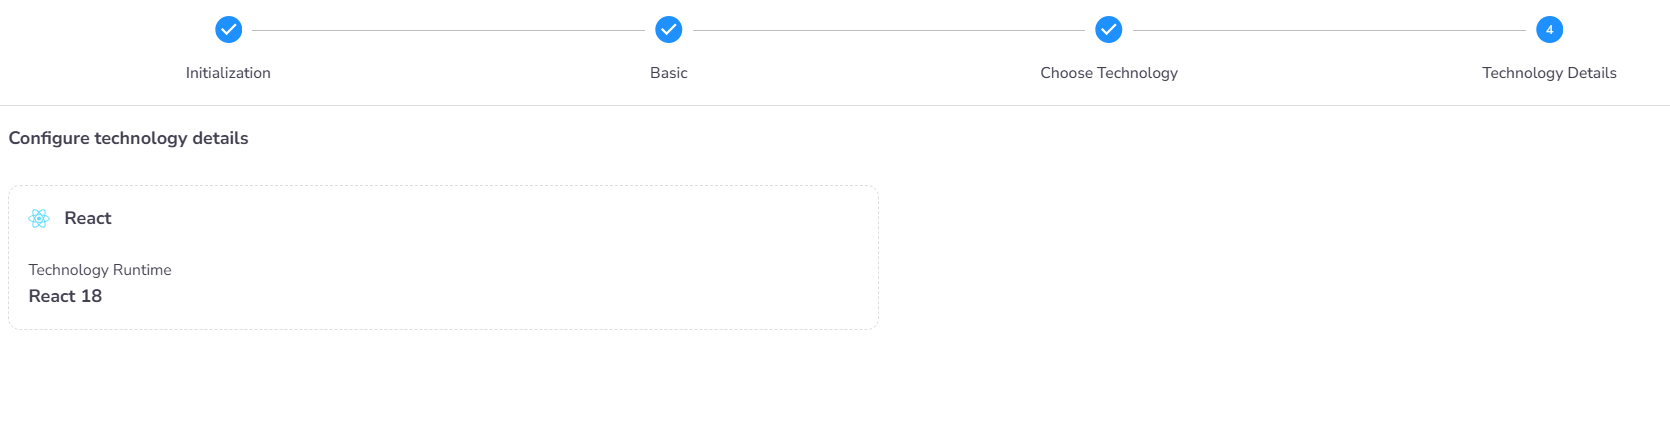
Step 4: Technology Runtime Details
Provide the technical configuration for the selected execution environment. This ensures the challenge environment is provisioned with the correct runtime versions and dependencies.
Post-Creation: Environment Setup
Once the basic configuration is finalized, navigate to the Code tab from the Challenge General Details Page to complete the technical setup.
Setting up the Project
The Edit Code interface provides a full-featured IDE environment to prepare the challenge for candidates:

- Boilerplate Code: Upload or create the initial multi-file project structure. This is the starting state candidates will see when they begin the challenge.
- Dependency management: You can find the Dependencies section in the left sidebar (below the file explorer). Use this to pre-install necessary packages (e.g., via
npmorpip) so candidates have a ready-to-code environment. - Unit Tests: If you configured the challenge for Unit Test evaluation, use this interface to add and verify the test suite.
- Web Preview: Utilize the Web Preview feature to render the application in real-time. This allows you to verify that your boilerplate code and environment setup are working correctly.
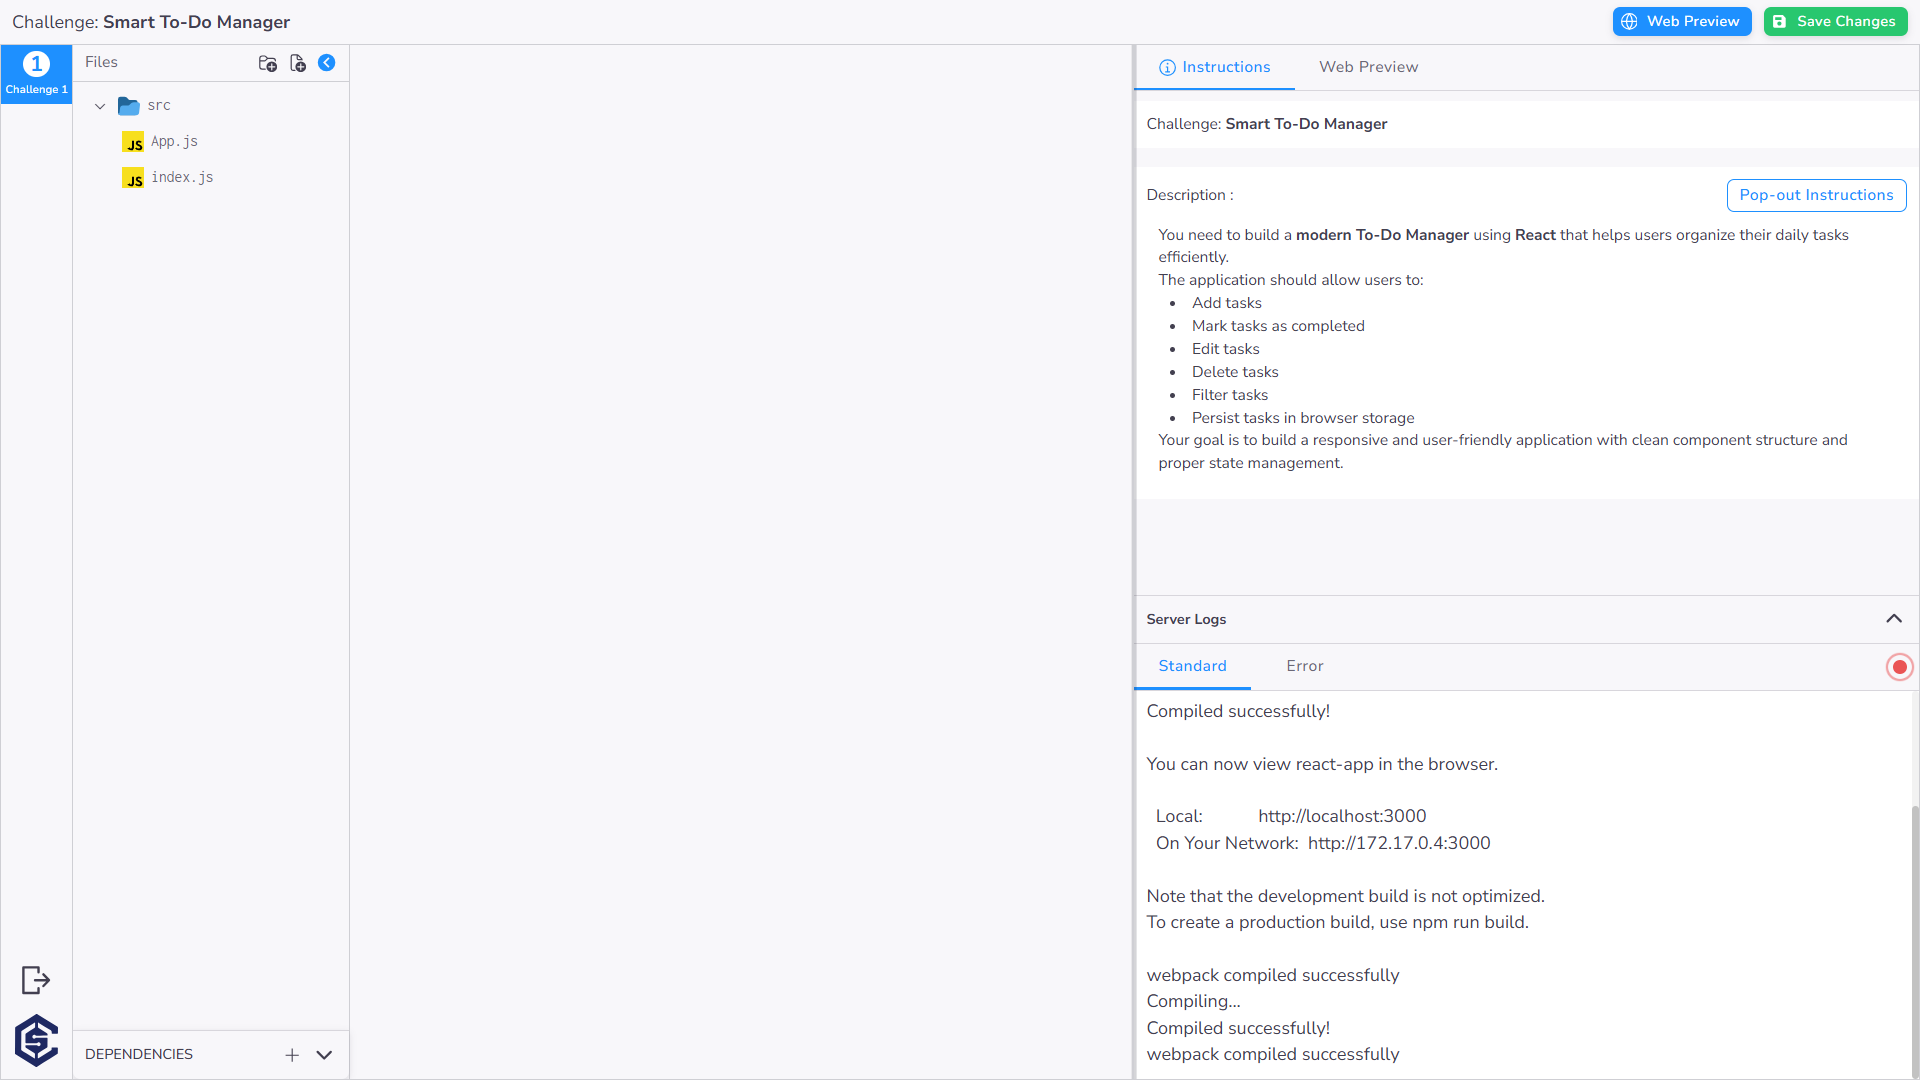
Always ensure you click Save Changes once your environment, boilerplate, and tests are finalized.