Create Your First Assessment
Creating an Assessment in CoderScout allows you to design a structured, multi-stage evaluation workflow for a specific job opening.
This guide walks you through the entire process—from defining the role to inviting candidates—using the same steps you see in the product.
Overview of the assessment creation flow
Creating an Assessment consists of four steps:
- Job Opening
- Setup Stages
- Basic Details
- Candidates
Each step is designed to reduce manual effort while giving you full control over how candidates are evaluated.
Step 1: Define the Job Opening
The first step is to provide details about the job role for which you are creating the assessment.
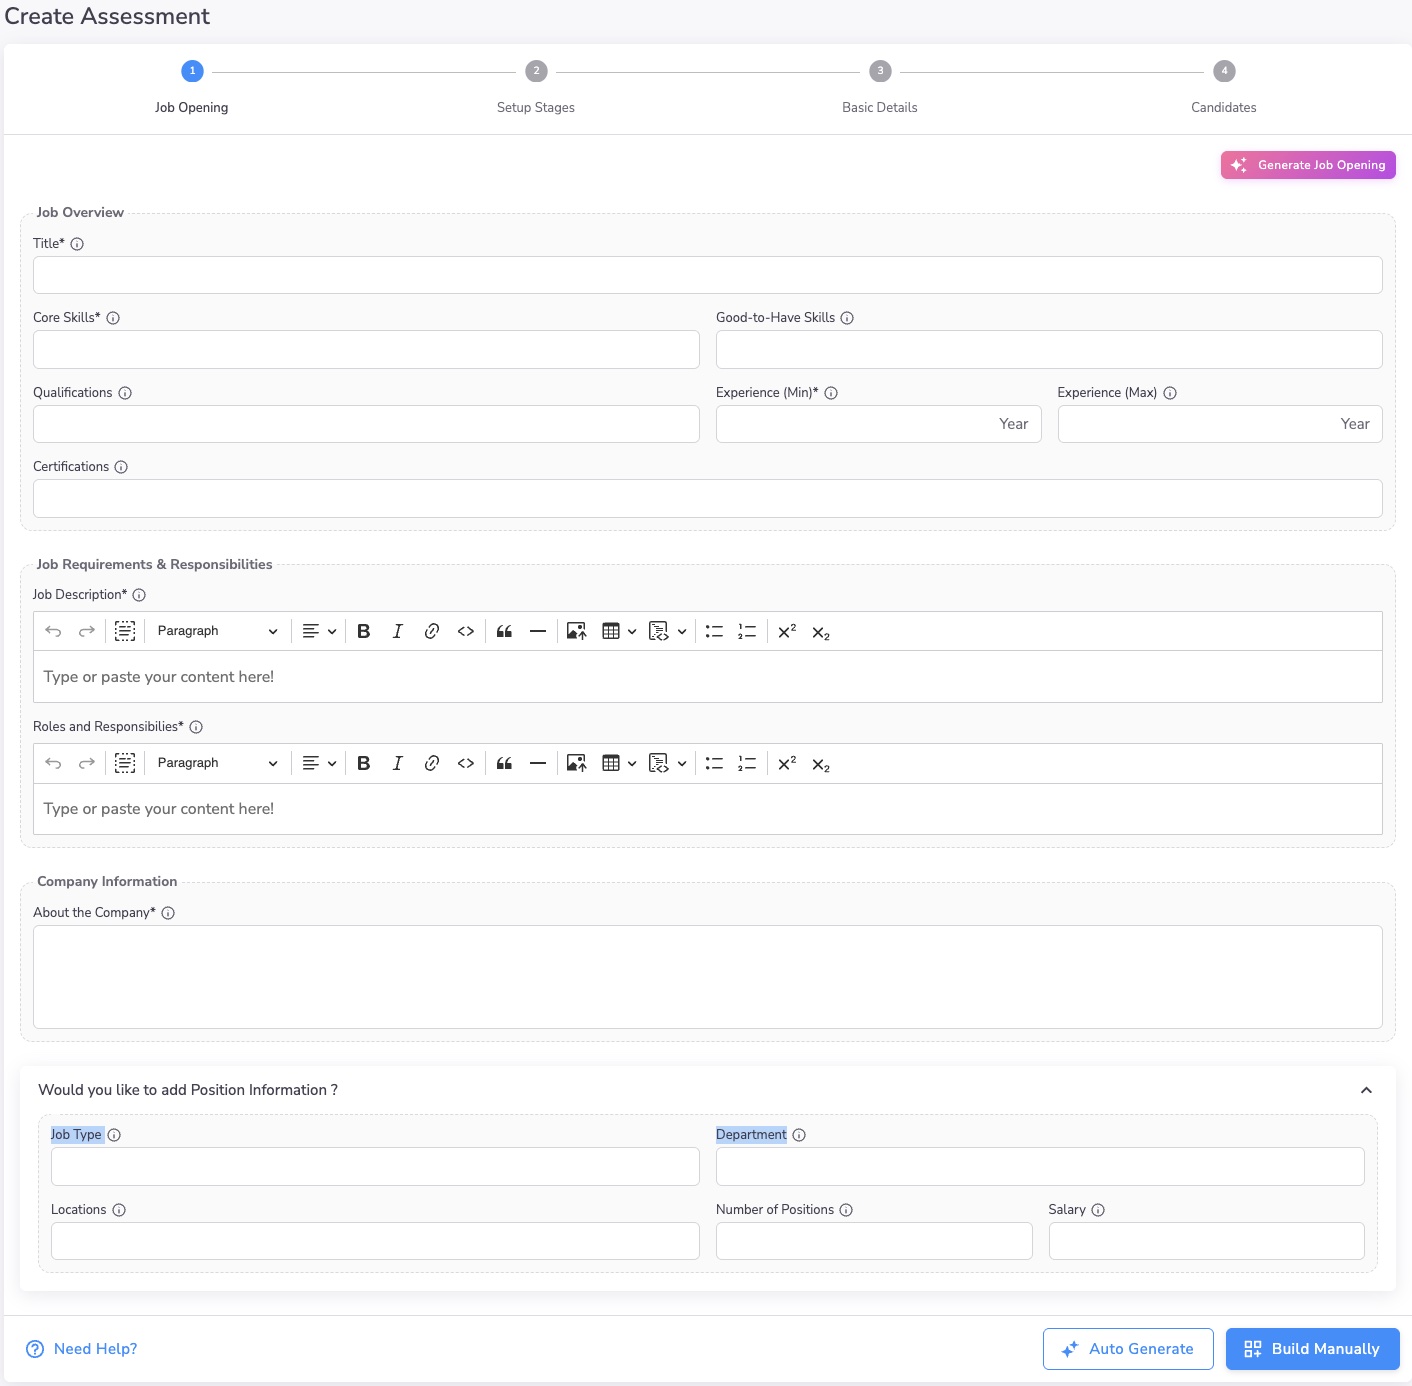
Information you can provide
- Job title
- Core skills and good-to-have skills
- Minimum and maximum experience
- Qualifications and certifications
- Job description
- Roles and responsibilities
- Company information
- Optional position details such as department, location, salary, and number of openings
Many of these fields are optional, but providing richer information helps improve downstream screening and evaluation.
Auto-generate job opening using AI (optional)
Instead of filling everything manually, you can start with a Job Description text and let CoderScout generate the job opening details for you.
Click Generate Job Opening and provide:
- Role title
- Experience expectations
- Location
- Employment type
- Company overview
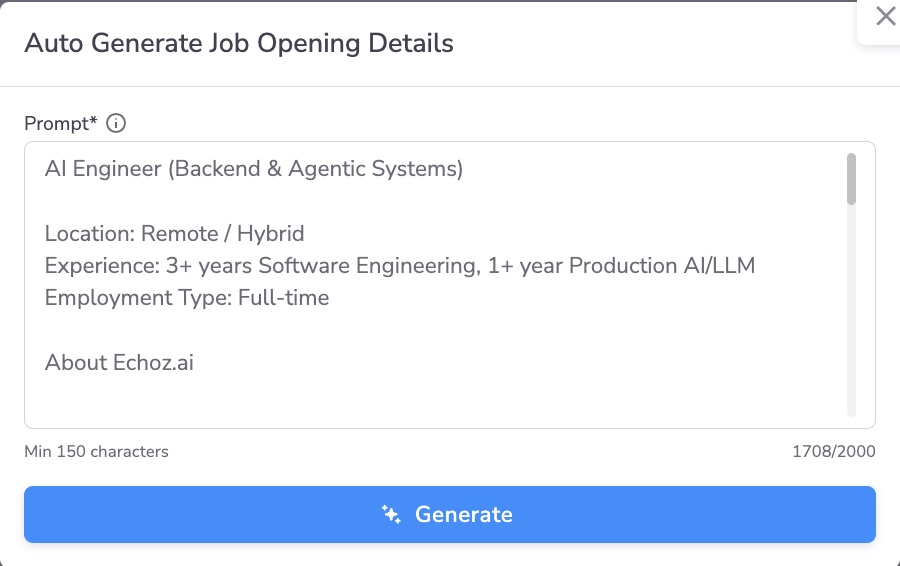
The AI uses this input to pre-fill all relevant fields. You can then review and edit anything before proceeding.
This is a fast way to get started without compromising accuracy.
Step 2: Setup assessment stages
Once the job opening is defined, the next step is to configure the stages of your assessment.
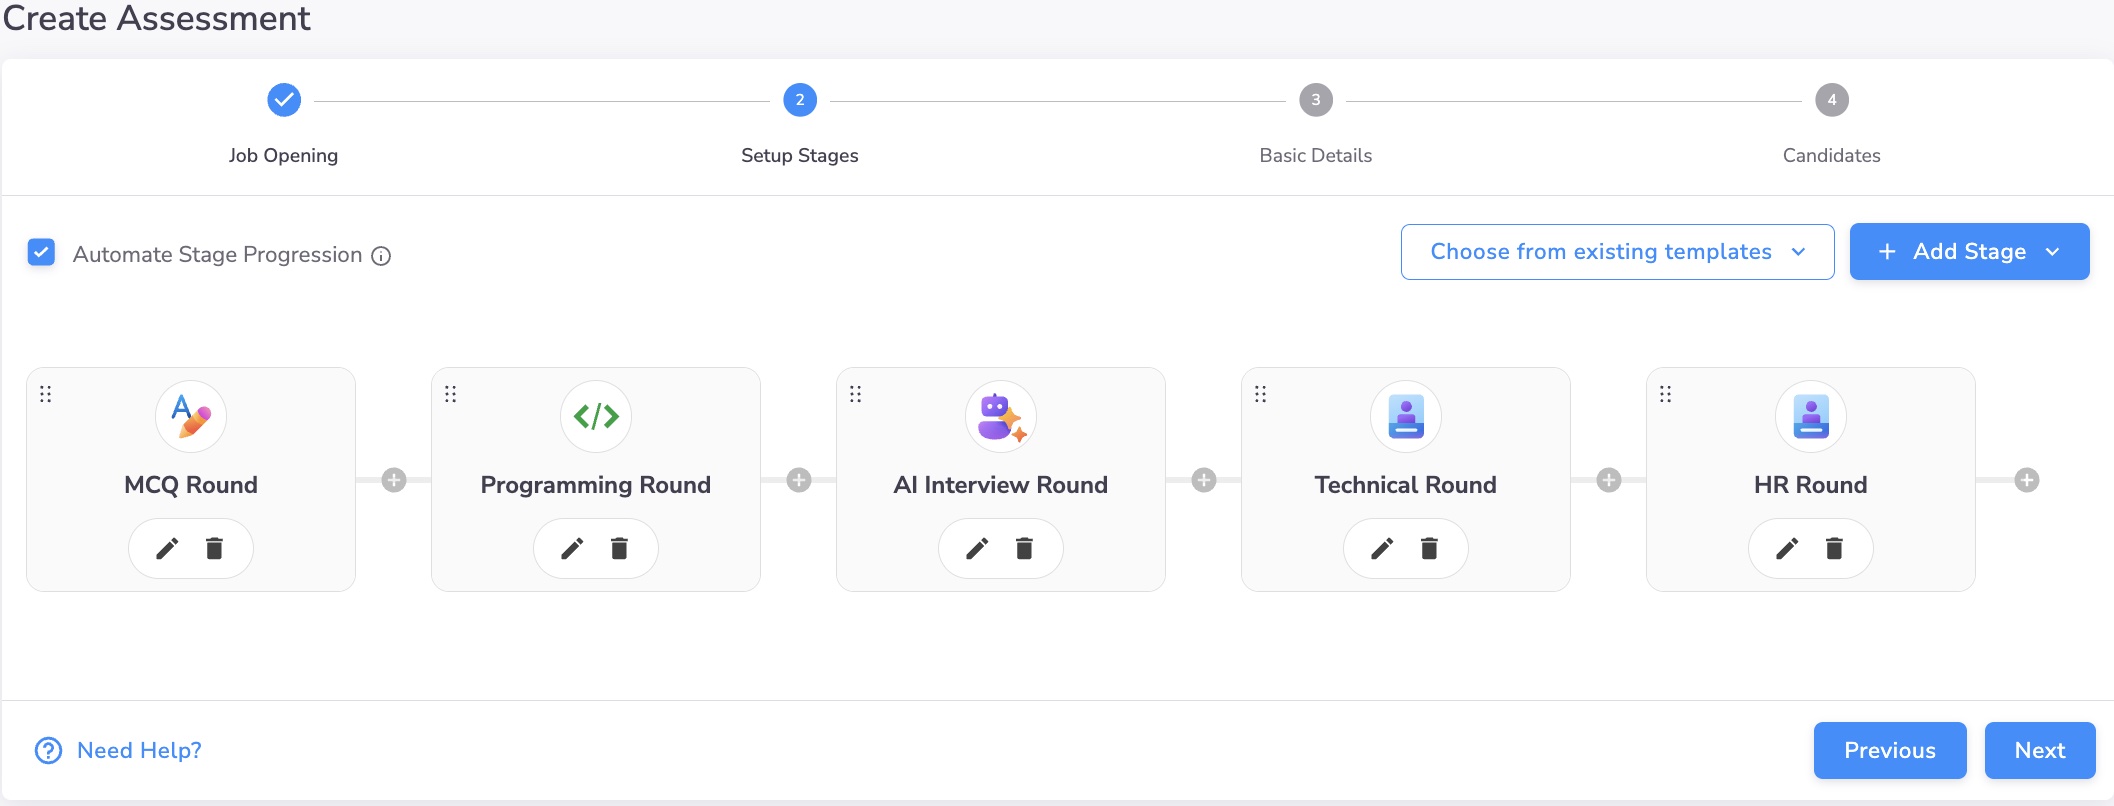
You can:
- Build stages manually
- Generate stages known best-practices using AI and then tweak them
Common examples of stages
- Quiz Round
- Programming Round
- Application Round
- AI Interview Round
- Technical Interview
- HR Interview
What you can do in this step
- Add or remove stages
- Reorder stages
- Customize each stage independently
- Control how candidates progress between stages
Common stage configurations
All stage types support some common configuration options:
-
Deadline to start by
How long a candidate has to start the stage after receiving an invite -
Maximum duration
Time allowed to complete the stage once started -
Progression score (%)
Cutoff score used to automatically move candidates to the next stage
Each stage type also has its own specific configuration options depending on whether it is an Quiz, Programming, Application, or AI Interview stage.
This allows you to design a workflow that screens candidates effectively before involving Hiring Managers or Subject Matter Experts.
Step 3: Configure basic assessment details
After setting up stages, you configure overall assessment settings.
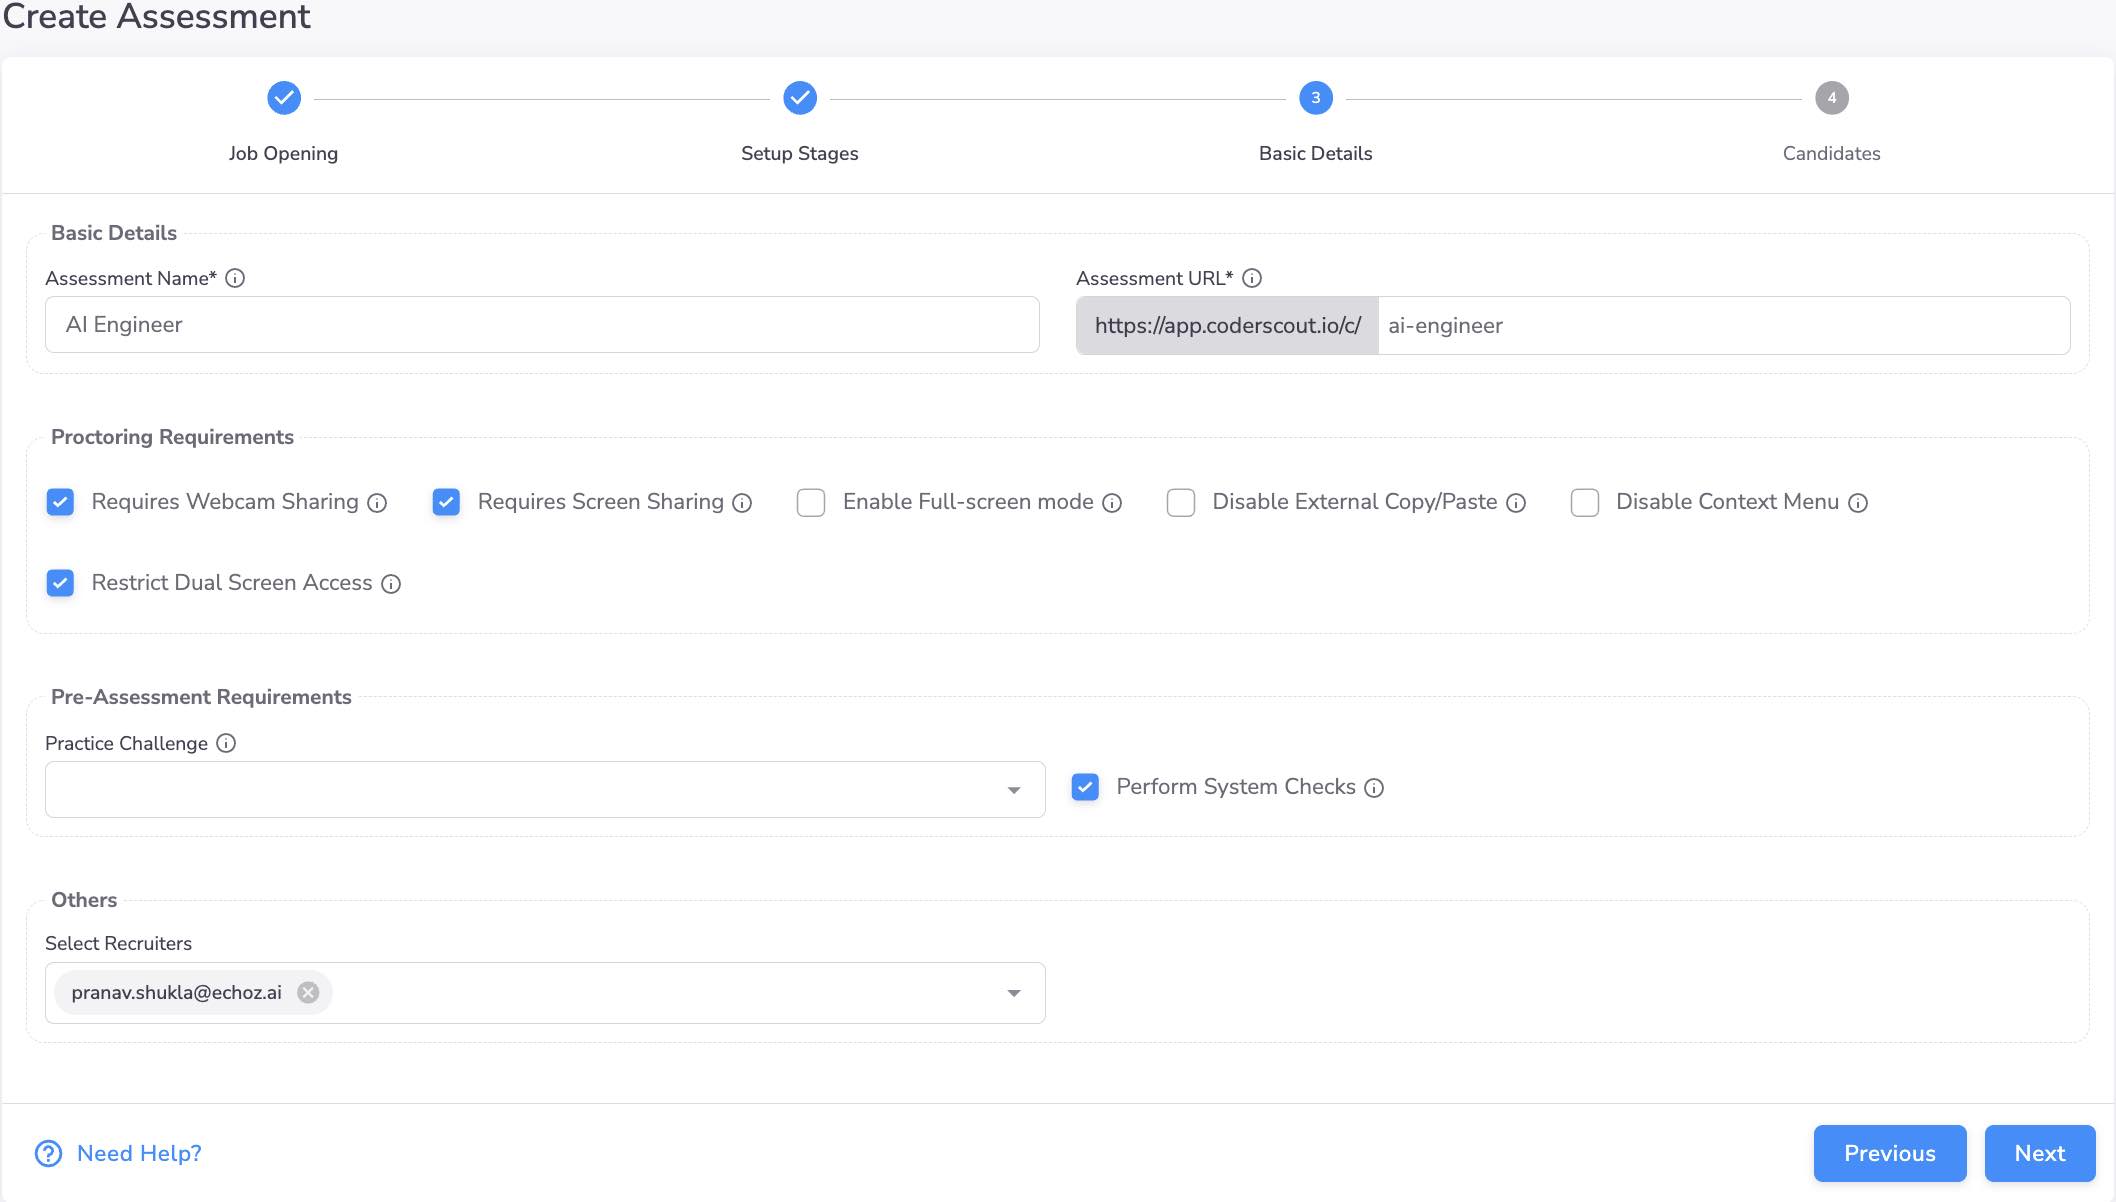
Assessment details
- Assessment name
- Assessment URL (used for sharing)
Proctoring and system requirements
You can enable or disable:
- Webcam sharing
- Screen sharing
- Full-screen mode
- Dual screen restriction
- Copy-paste and context menu restrictions
- Pre-assessment system checks
These settings apply across stages and help ensure fair and remote-friendly evaluations.
Recruiter notifications
You can select one or more Recruiters for the assessment.
Recruiters receive email notifications when:
- A candidate starts a stage
- A candidate submits a stage
- Assessment reports are generated
This keeps the right stakeholders informed without requiring constant manual tracking.
Step 4: Invite candidates or accept applications
The final step is to bring candidates into the assessment.
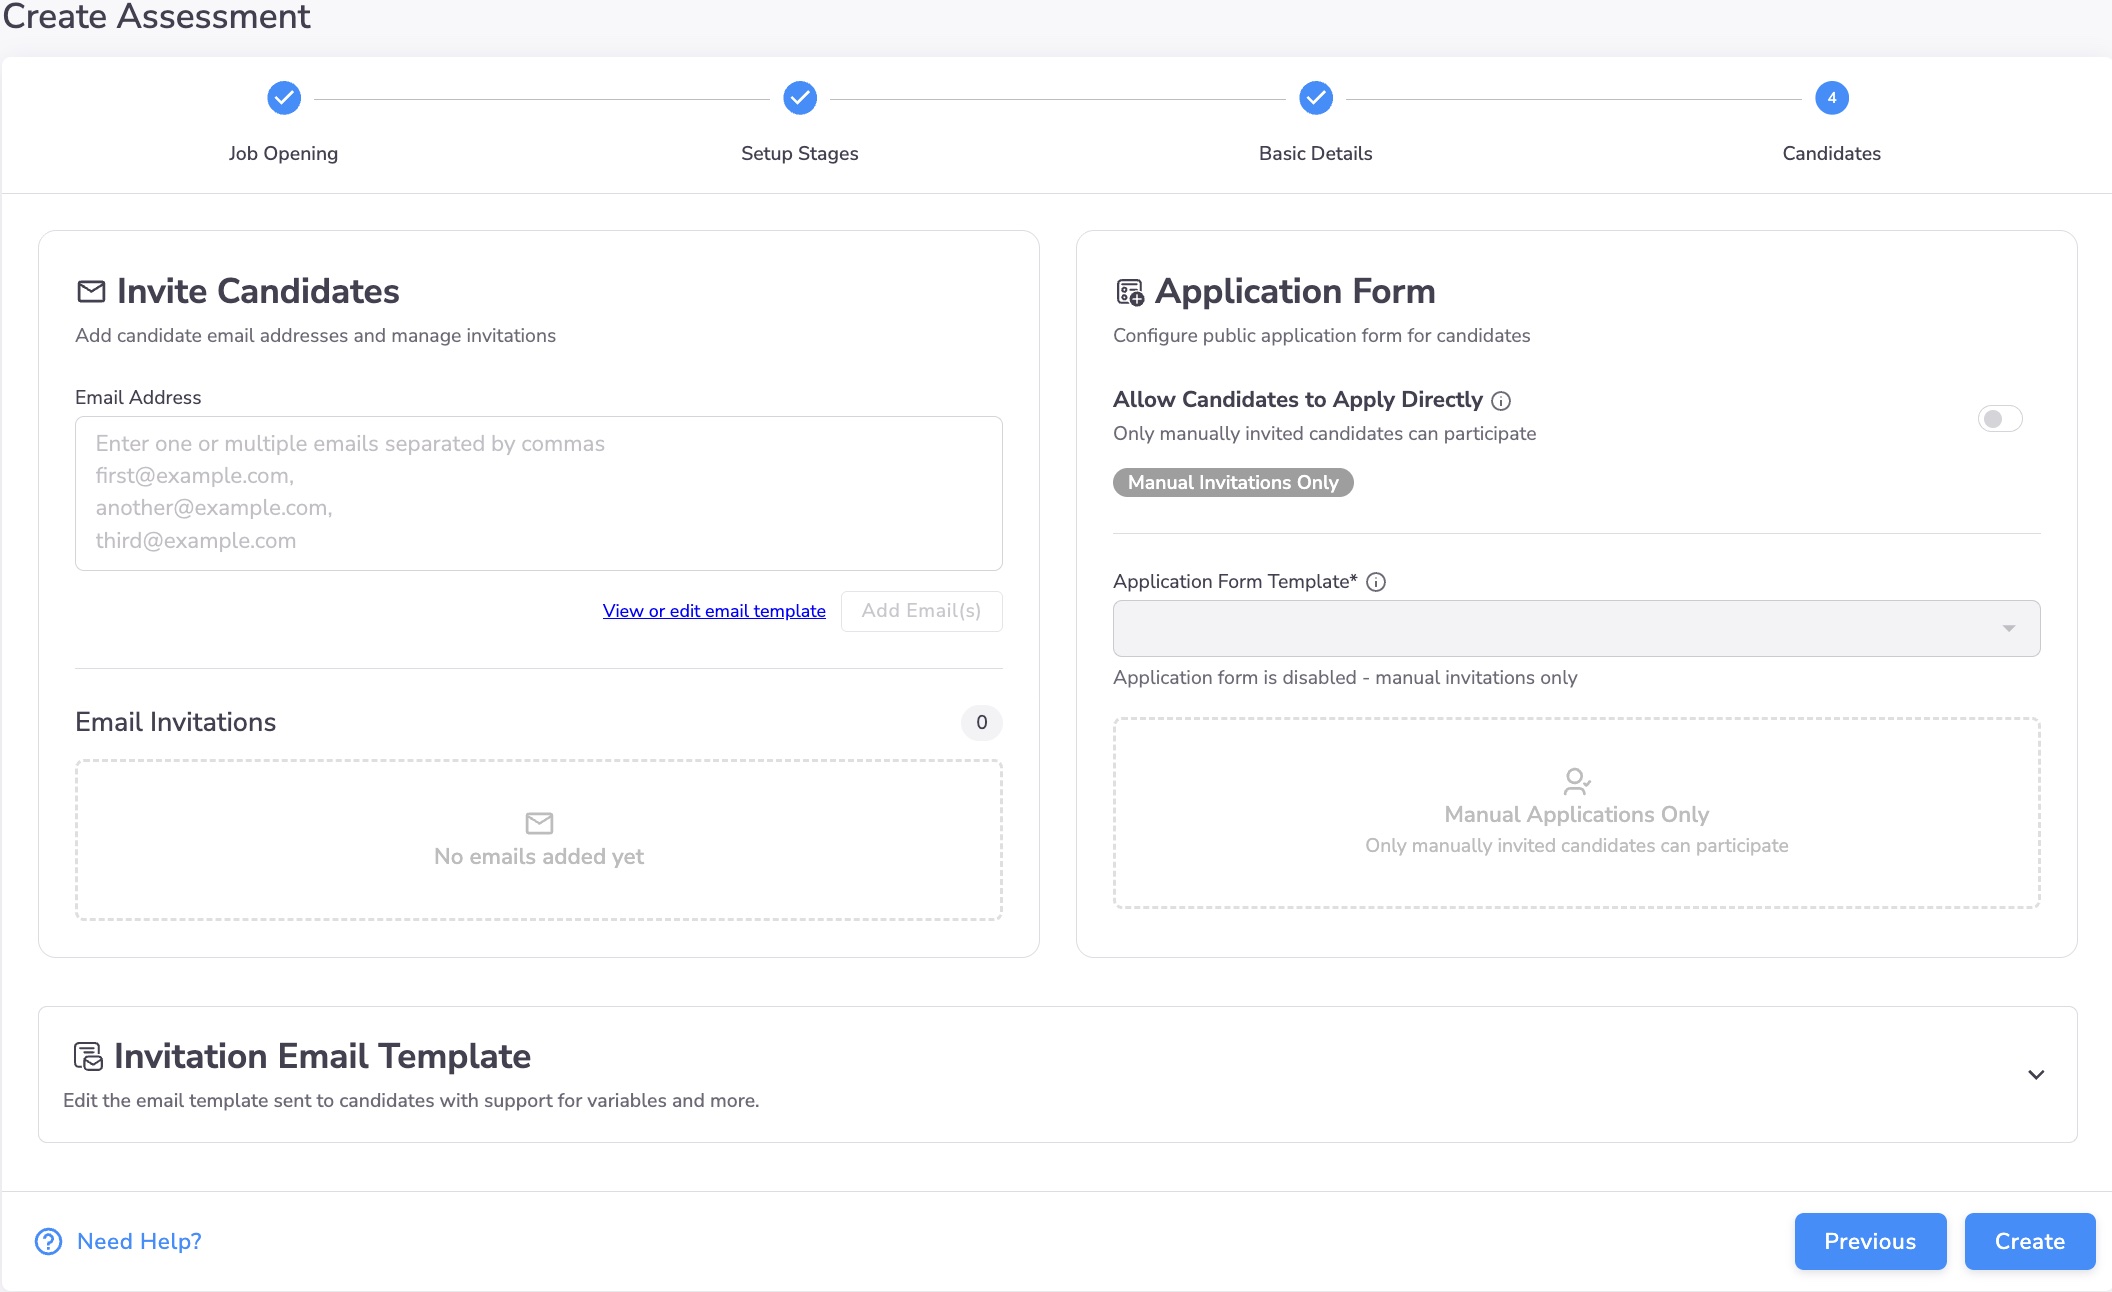
Option 1: Invite candidates directly
- Enter one or more candidate email addresses
- Preview and customize the invitation email
- Send invites immediately
Option 2: Allow candidates to apply directly (optional)
You can also allow candidates to apply using a public URL.
This requires configuring an Application Form, which lets you:
- Collect structured candidate information
- Upload resumes
- Apply rule-based eligibility checks
- Automatically invite qualified candidates
Learn more here:
👉 Application Forms
Both options can be used together if needed.
What happens after creation
Once the assessment is created:
- Candidates can take stages at their convenience
- All actions are recorded with full playback and evidence
- AI-generated scores and insights are available on leaderboards
- Hiring Managers and SMEs can review performance and evidence before interviews
This ensures interviews happen only after meaningful skill validation, saving time for everyone involved.
Next steps
-
Learn about different stage types →
Stage Types -
Set up candidate intake →
Direct Applications -
Manage database environments →
Databases