Programming Challenge
Overview
Programming Challenges evaluate a candidate's ability to solve real-world logic and algorithmic problems. These challenges provide a full IDE experience and support a wide range of popular programming languages.
Configuration Process
Creating a Programming challenge follows a multi-step guided workflow to ensure the problem is correctly calibrated for your needs.
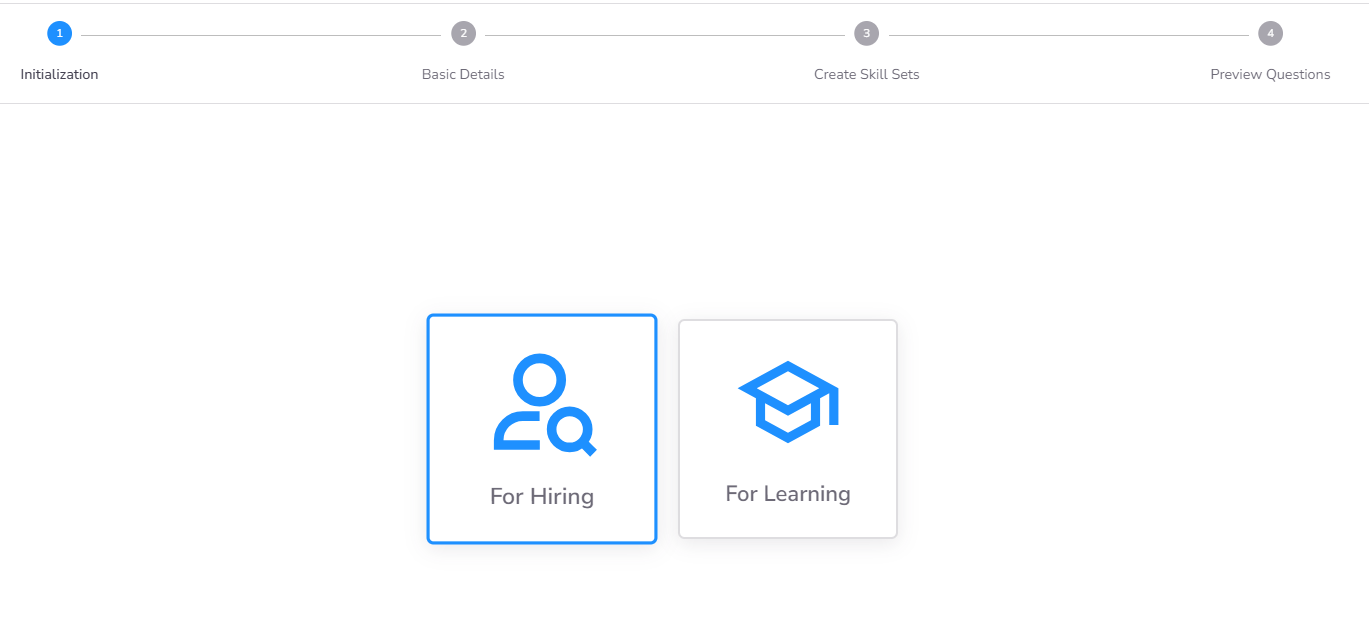
Step 1: Define Purpose
Determine the primary objective of the challenge:
- Hiring Purpose: Used in Assessments and Contests to evaluate external candidates.
- Learning Purpose: Used in Courses for internal employee upskilling and knowledge validation.
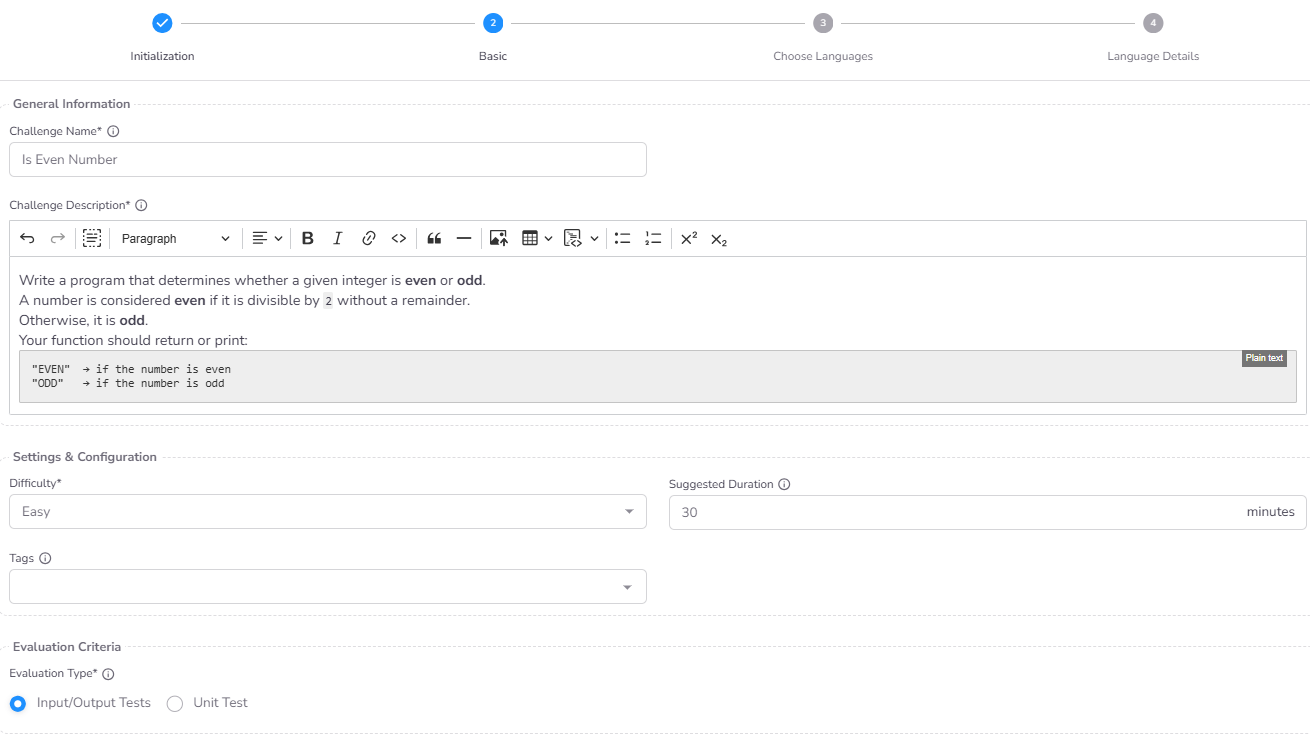
Step 2: Basic Details & Evaluation Type
Configure the metadata and the core scoring mechanism:
- Name and Description: Clear identification for the library and candidates.
- Difficulty and Duration: Define the complexity level and the time limit for the task.
- Tags: Assign technical skill tags for better library indexing.
- Evaluation Type:
- Input/Output: Evaluation based on matching program output against expected results for given inputs.
- Unit Test: Evaluation based on executing code-level unit tests against the candidate's solution.
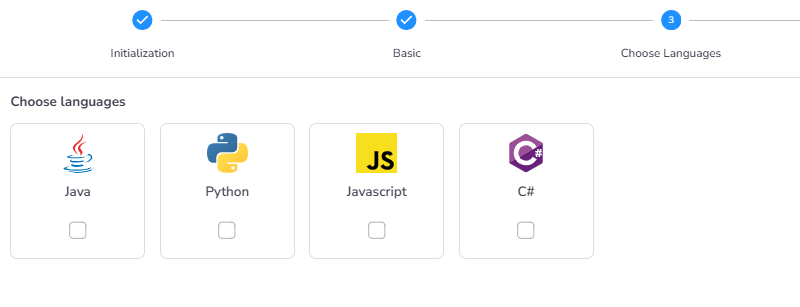
Step 3: Supported Languages
Select the programming languages you wish to make available for this specific challenge. You can enable multiple languages (e.g., Java, Python, JavaScript) to allow candidates to use their preferred environment.
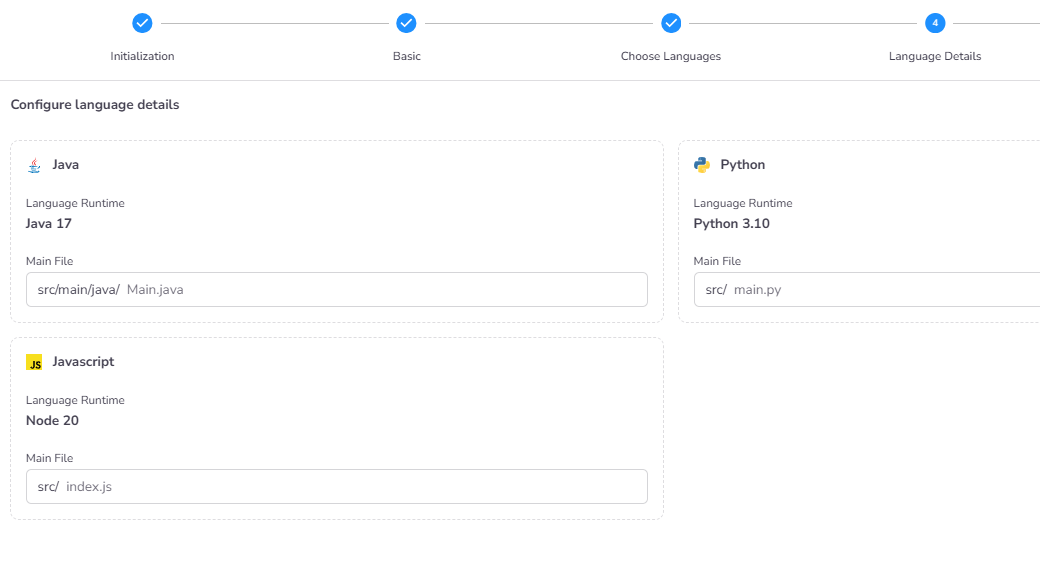
Step 4: Language-Specific Details
For each selected language, you must confirm the Main File Name. This is the file that CoderScout will use as the execution entry point during evaluation.
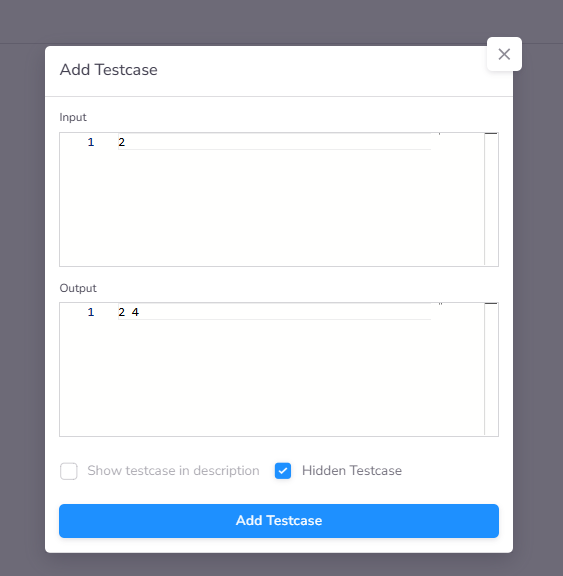
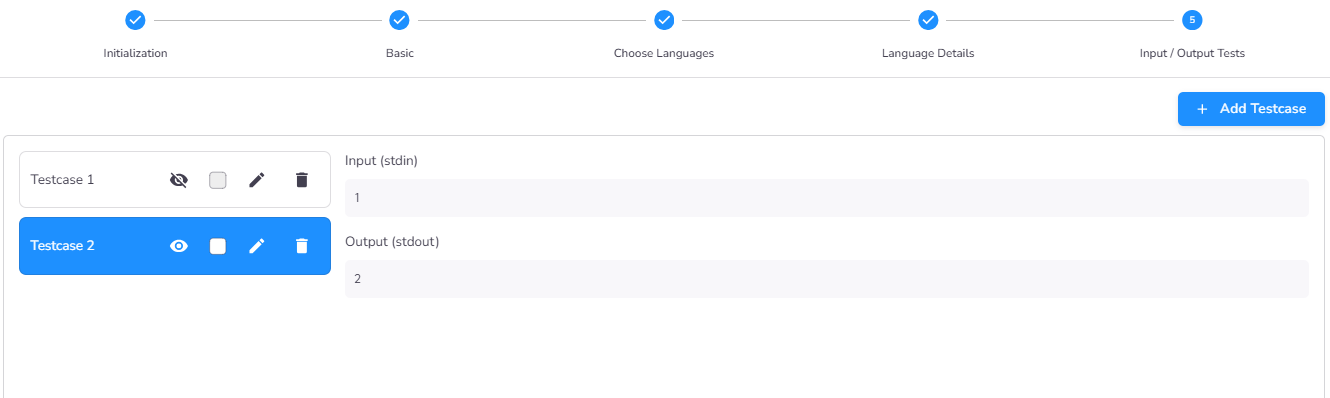
Step 5: Test Case Configuration (For I/O Evaluation)
If you selected Input/Output as the evaluation type in Step 2, this final step allows you to define the test cases. Each test case consists of:
- Input Data: The input provided to the candidate's program.
- Expected Output: The exact output the program is expected to produce.
Post-Creation: Code and Boilerplate Setup
Once the challenge is created, you will be redirected to the Challenge General Details Page. To finalize the technical setup, navigate to the Code tab.
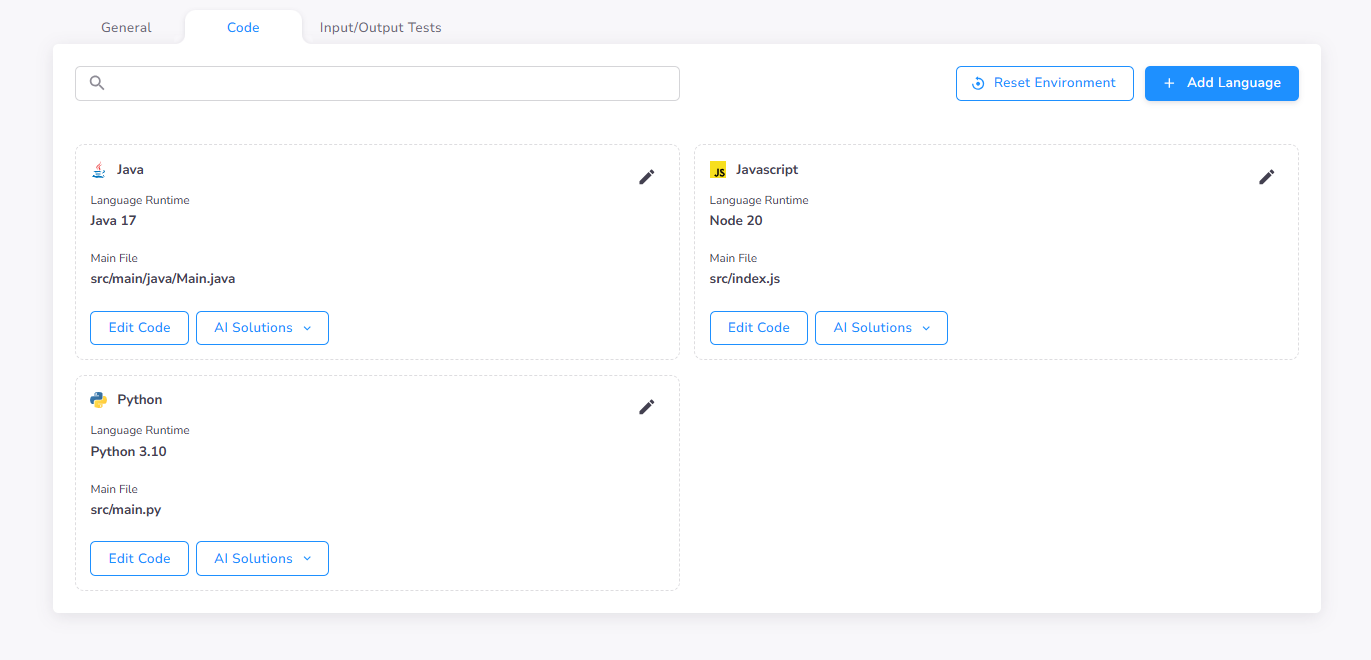
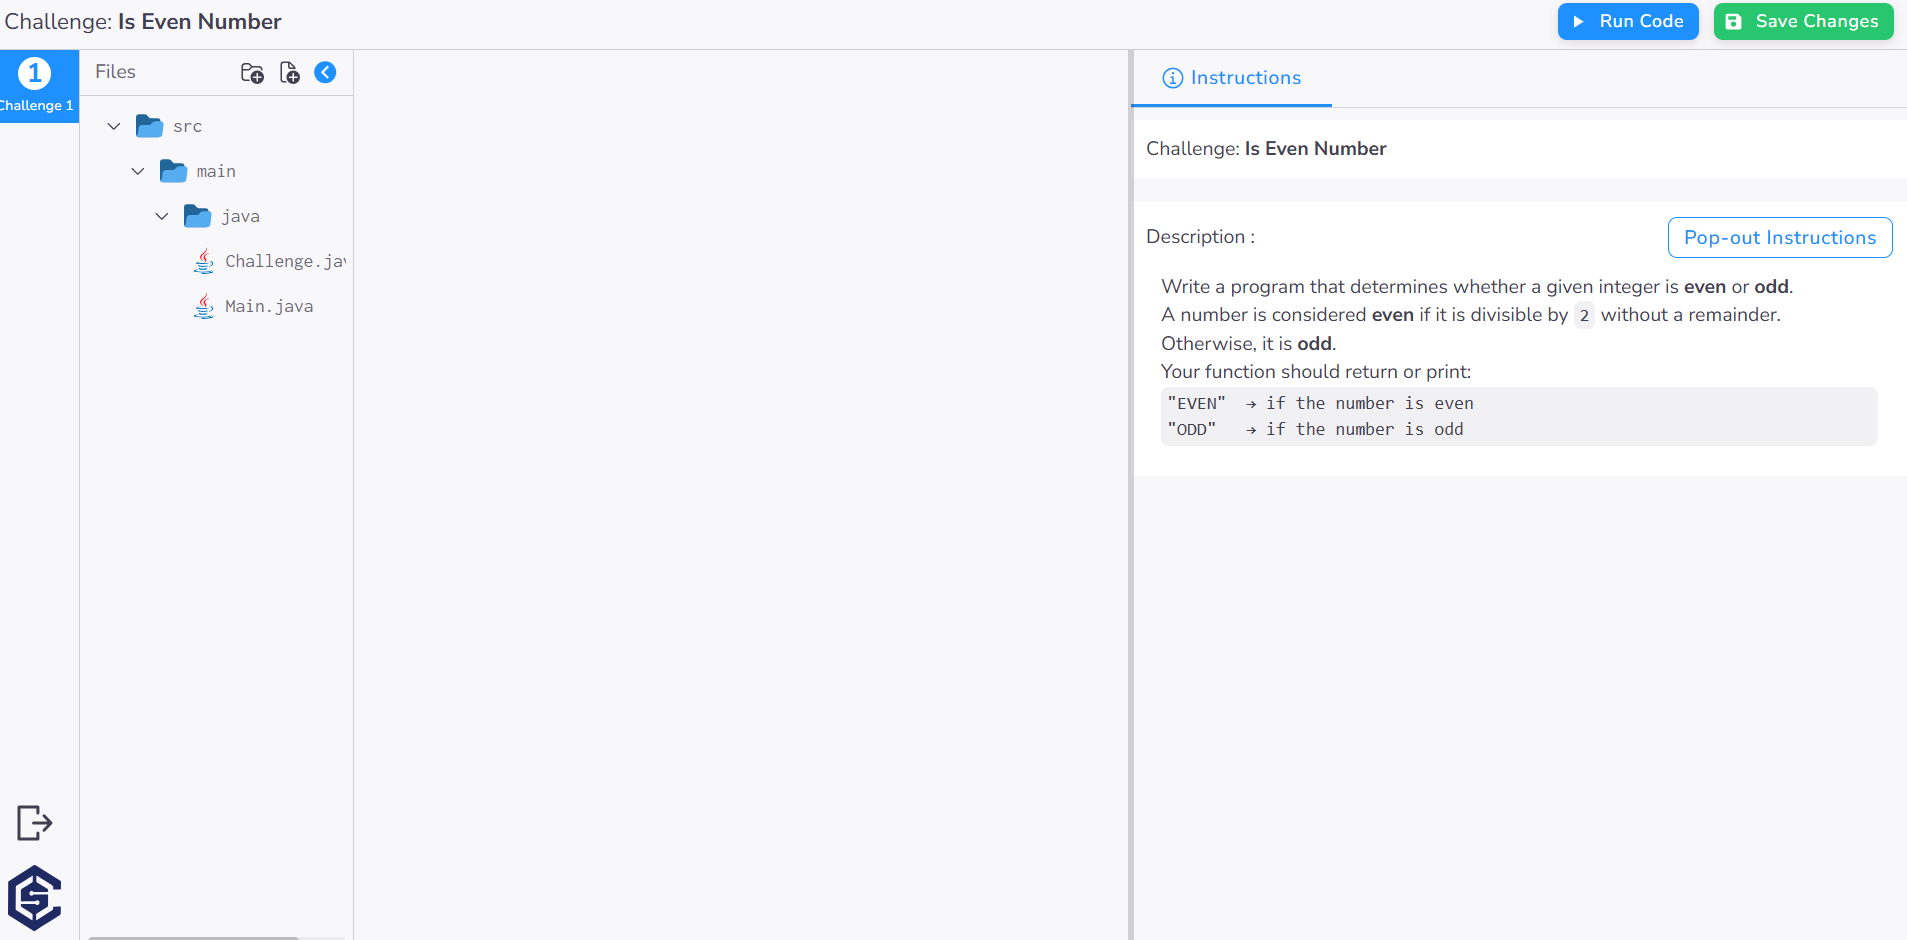
Adding Boilerplate Code
Through the Edit Code interface, you can provide the starting code (boilerplate) that candidates will see when they first open the challenge. This ensures they focus on the logic rather than setting up standard boilerplate.
Configuring Unit Tests
If you selected the Unit Test evaluation type, you must provide the test suite in this interface. You can verify that your unit tests pass against the provided boilerplate code before using the challenge.
Ensure you click Save Changes once you have finalized the boilerplate and test configurations.