Create Your First Contest
A Contest in CoderScout is designed for large-scale, coordinated hiring, where many candidates participate in the same stages at the same time.
Contests are commonly used for:
- Campus hiring
- Off-campus hiring drives
- Walk-in and mass recruitment
- Hackathon-style evaluations
This guide walks you through creating your first Contest using the same four-step flow you see in the product.
Overview of the contest creation flow
Creating a Contest consists of four steps:
- Job Opening
- Setup Stages
- Basic Details
- Candidates
While the overall flow is similar to creating an Assessment, there are a few important differences that are highlighted in each step.
Step 1: Define the Job Opening (optional)
The first step allows you to define details about the job role associated with the Contest.
The fields and experience are identical to Assessments.
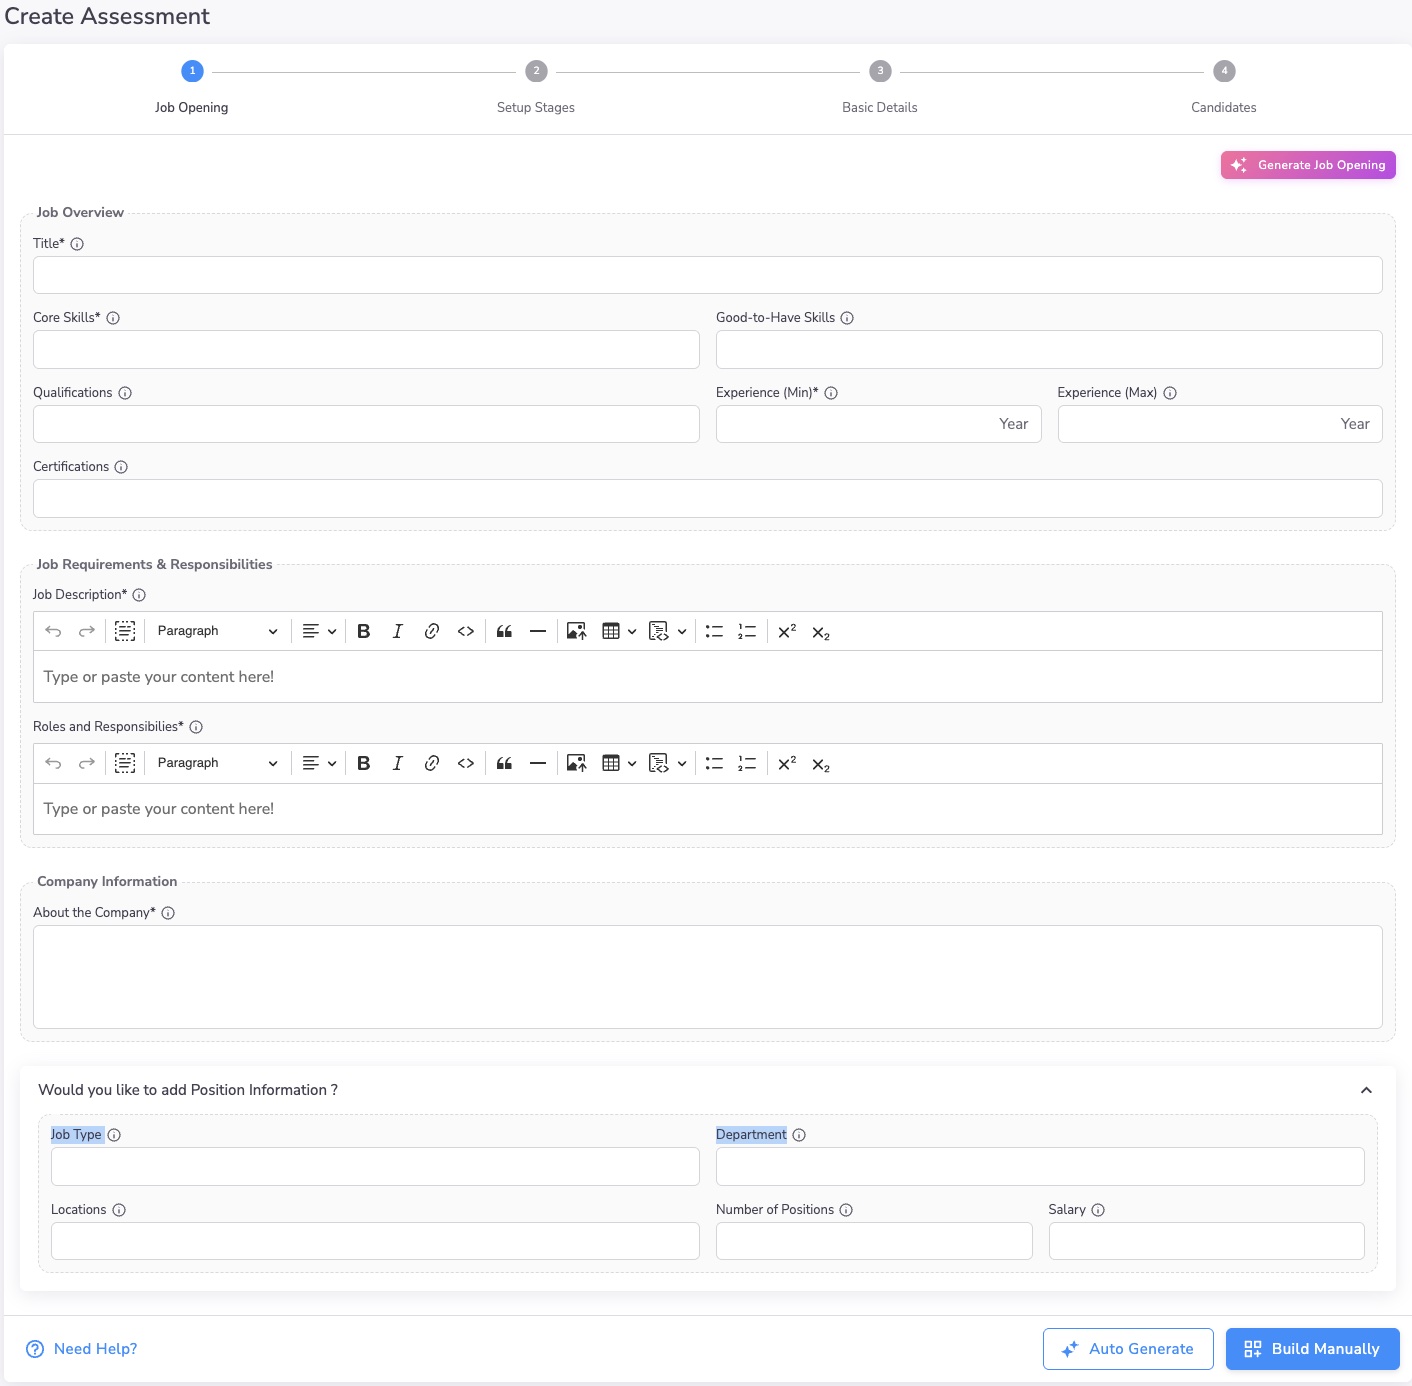
Key difference from Assessments
- Creating a Job Opening is optional for Contests
- Some organizations use Contests purely as screening events (for example, campus drives)
You can either:
- Fill in job details manually, or
- Use Generate Job Opening to auto-fill fields using AI from a job description
The AI-assisted flow works exactly the same as in Assessments.
Step 2: Setup contest stages
In this step, you configure the stages that candidates will go through, in sequence.
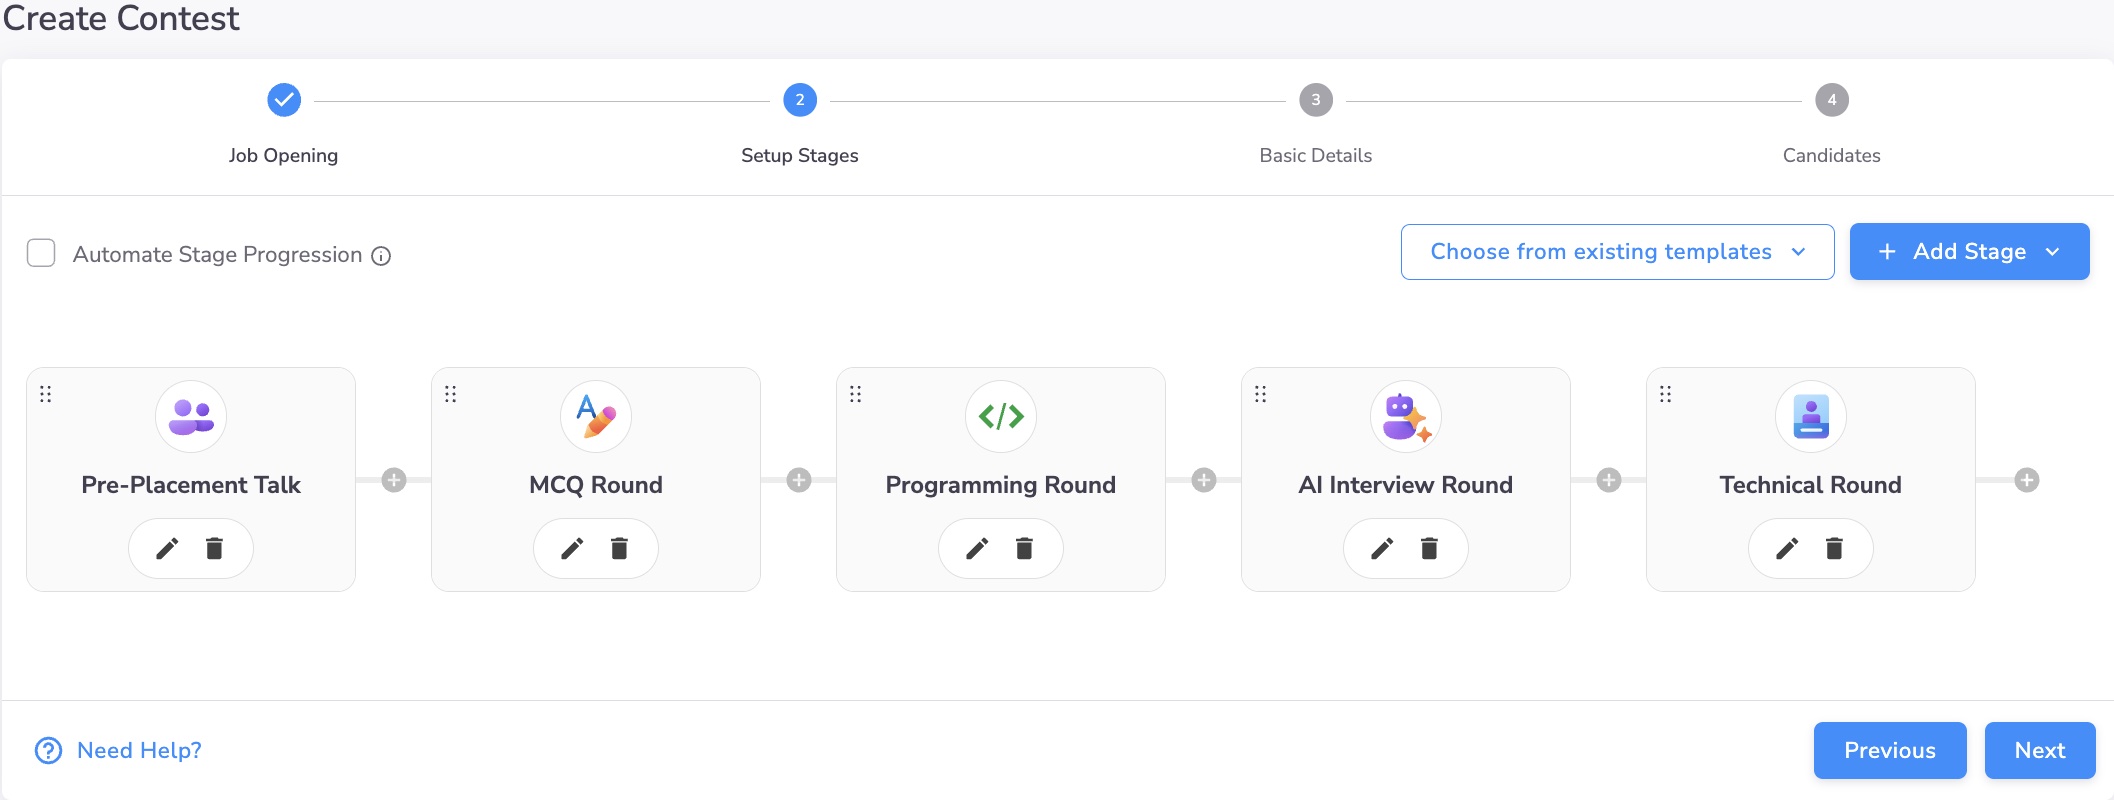
Pre-placement Talk (Contest-only stage)
Contests support a special stage type called Pre-placement Talk, which is only available in Contests.
What is a Pre-placement Talk?
- A live briefing conducted by the organization
- Used to introduce:
- The company
- The role(s)
- The selection process
- Expectations from candidates
How it works
- You configure a tentative duration (in minutes)
- All invited candidates can join this stage
- Organization representatives can:
- Share webcam
- Share screen (present slides or demos)
- Speak to candidates
- Answer questions via chat or voice
This allows you to conduct the briefing without switching platforms (Zoom, Google Meet, etc.) before starting the actual evaluation stages.
Other stages in a Contest
Apart from Pre-placement Talk, you can add all other stage types available in Assessments, such as:
- Quiz
- Programming
- Application
- AI Interview
- Technical / HR interviews
Stage configuration, difficulty, duration, and progression rules work the same way as they do in Assessments.
You can:
- Add or remove stages
- Reorder stages
- Customize each stage independently
Step 3: Configure contest basic details
In this step, you configure contest-level settings.
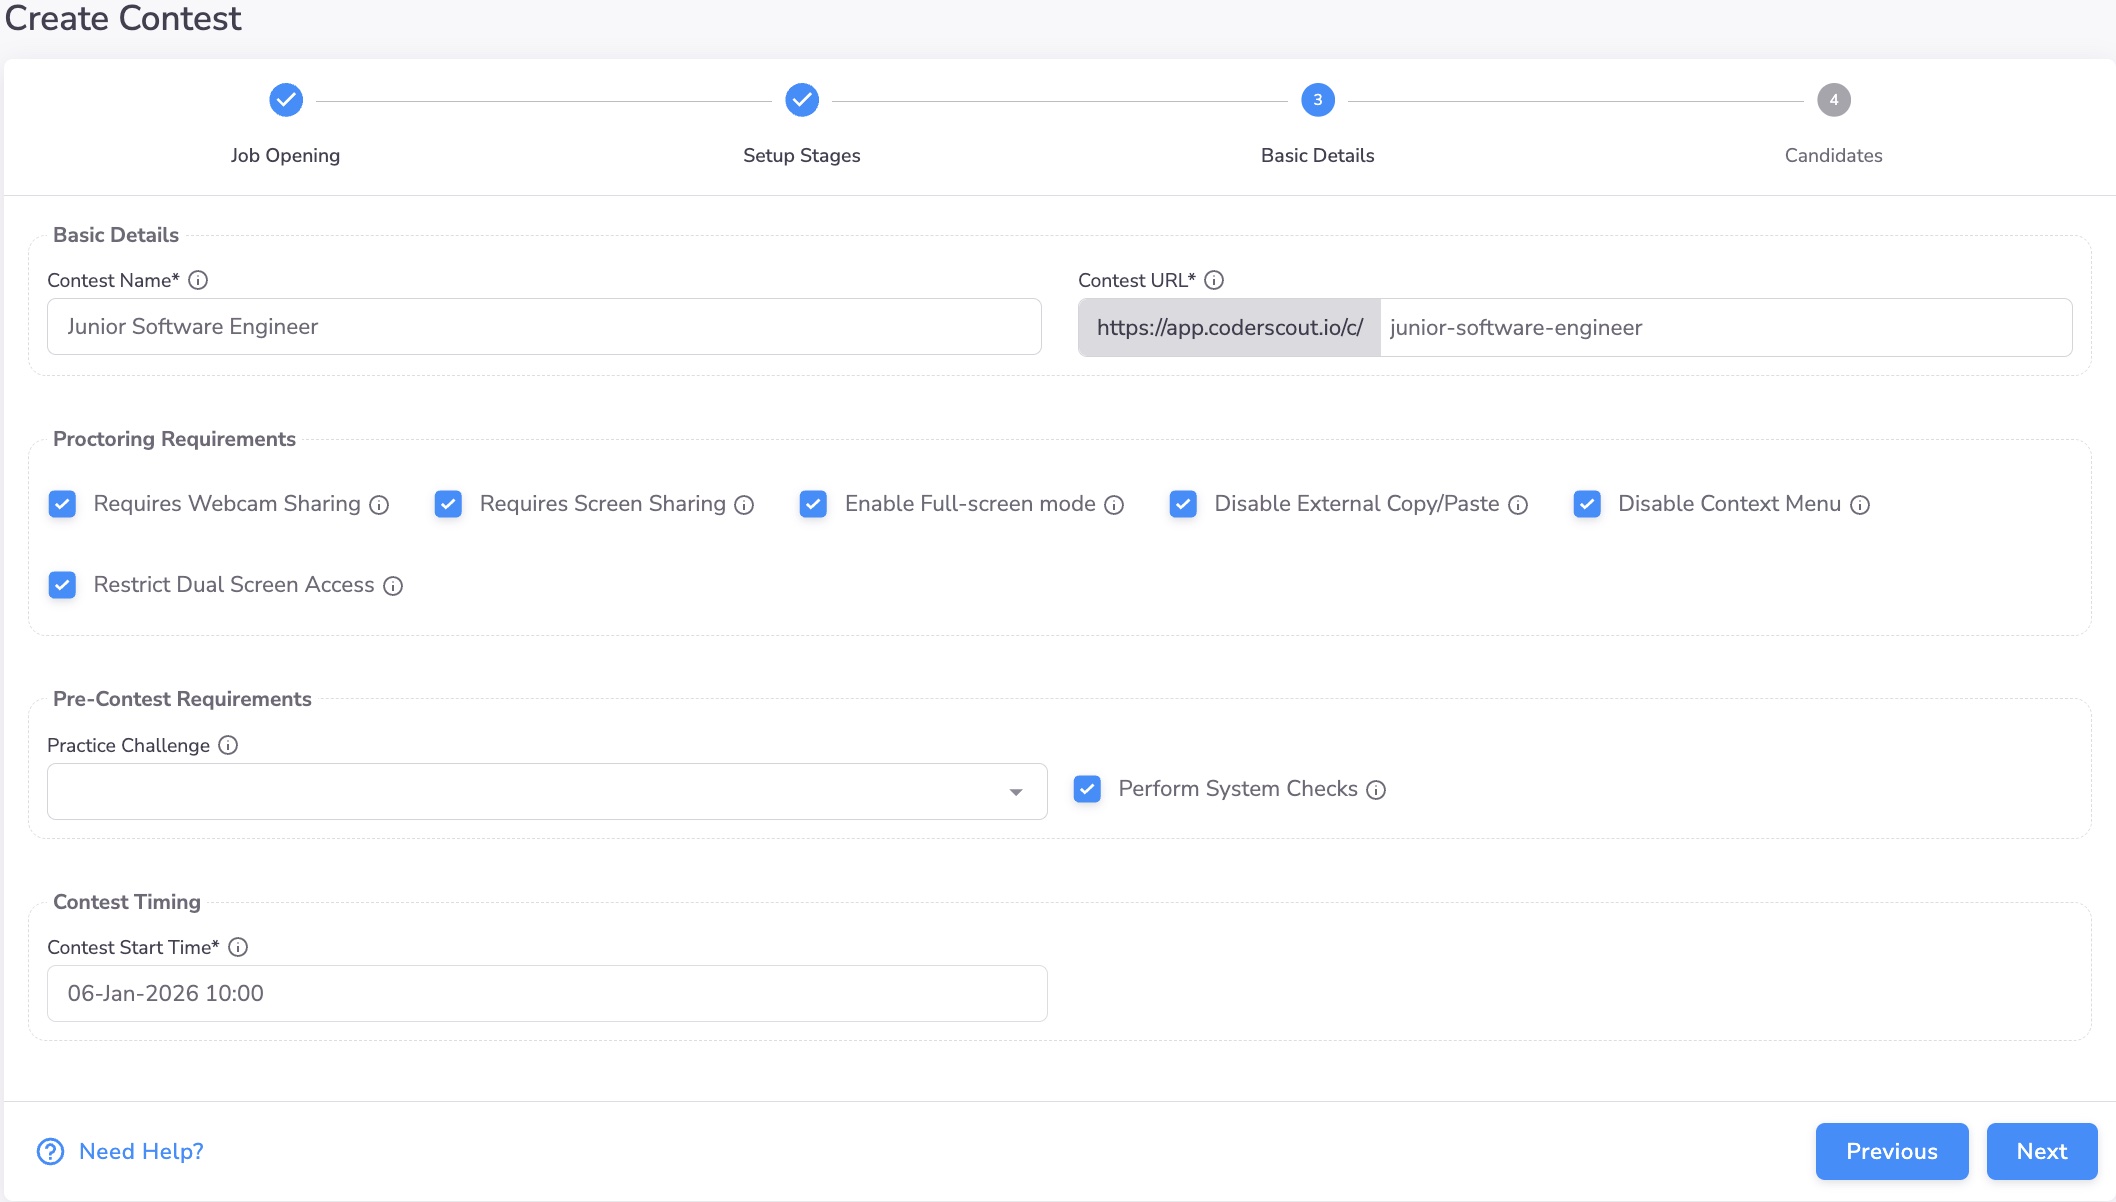
Contest details
- Contest name
- Contest URL (used for sharing with candidates)
Proctoring and system requirements
You can enable:
- Webcam sharing
- Screen sharing
- Full-screen mode
- Copy-paste restrictions
- Dual screen restrictions
- System checks before participation
Key differences from Assessments
- There is no Recruiter selection in Contests
- Email notifications for individual stage start/end are not required
This is because:
- Contests are actively supervised
- Stages are started and ended by the hiring team
- All candidates participate in a stage at the same time
Contest start time
You must set a Contest Start Time.
This represents the scheduled start of the Contest and is important because:
- All stages are coordinated events
- Candidates must be informed in advance
- The schedule is often communicated externally (campus TPOs, job boards, social media, etc.)
Examples:
- Campus drive scheduled with a university
- Off-campus hiring drive announced online
Step 4: Invite candidates or accept registrations
The final step is bringing candidates into the Contest.
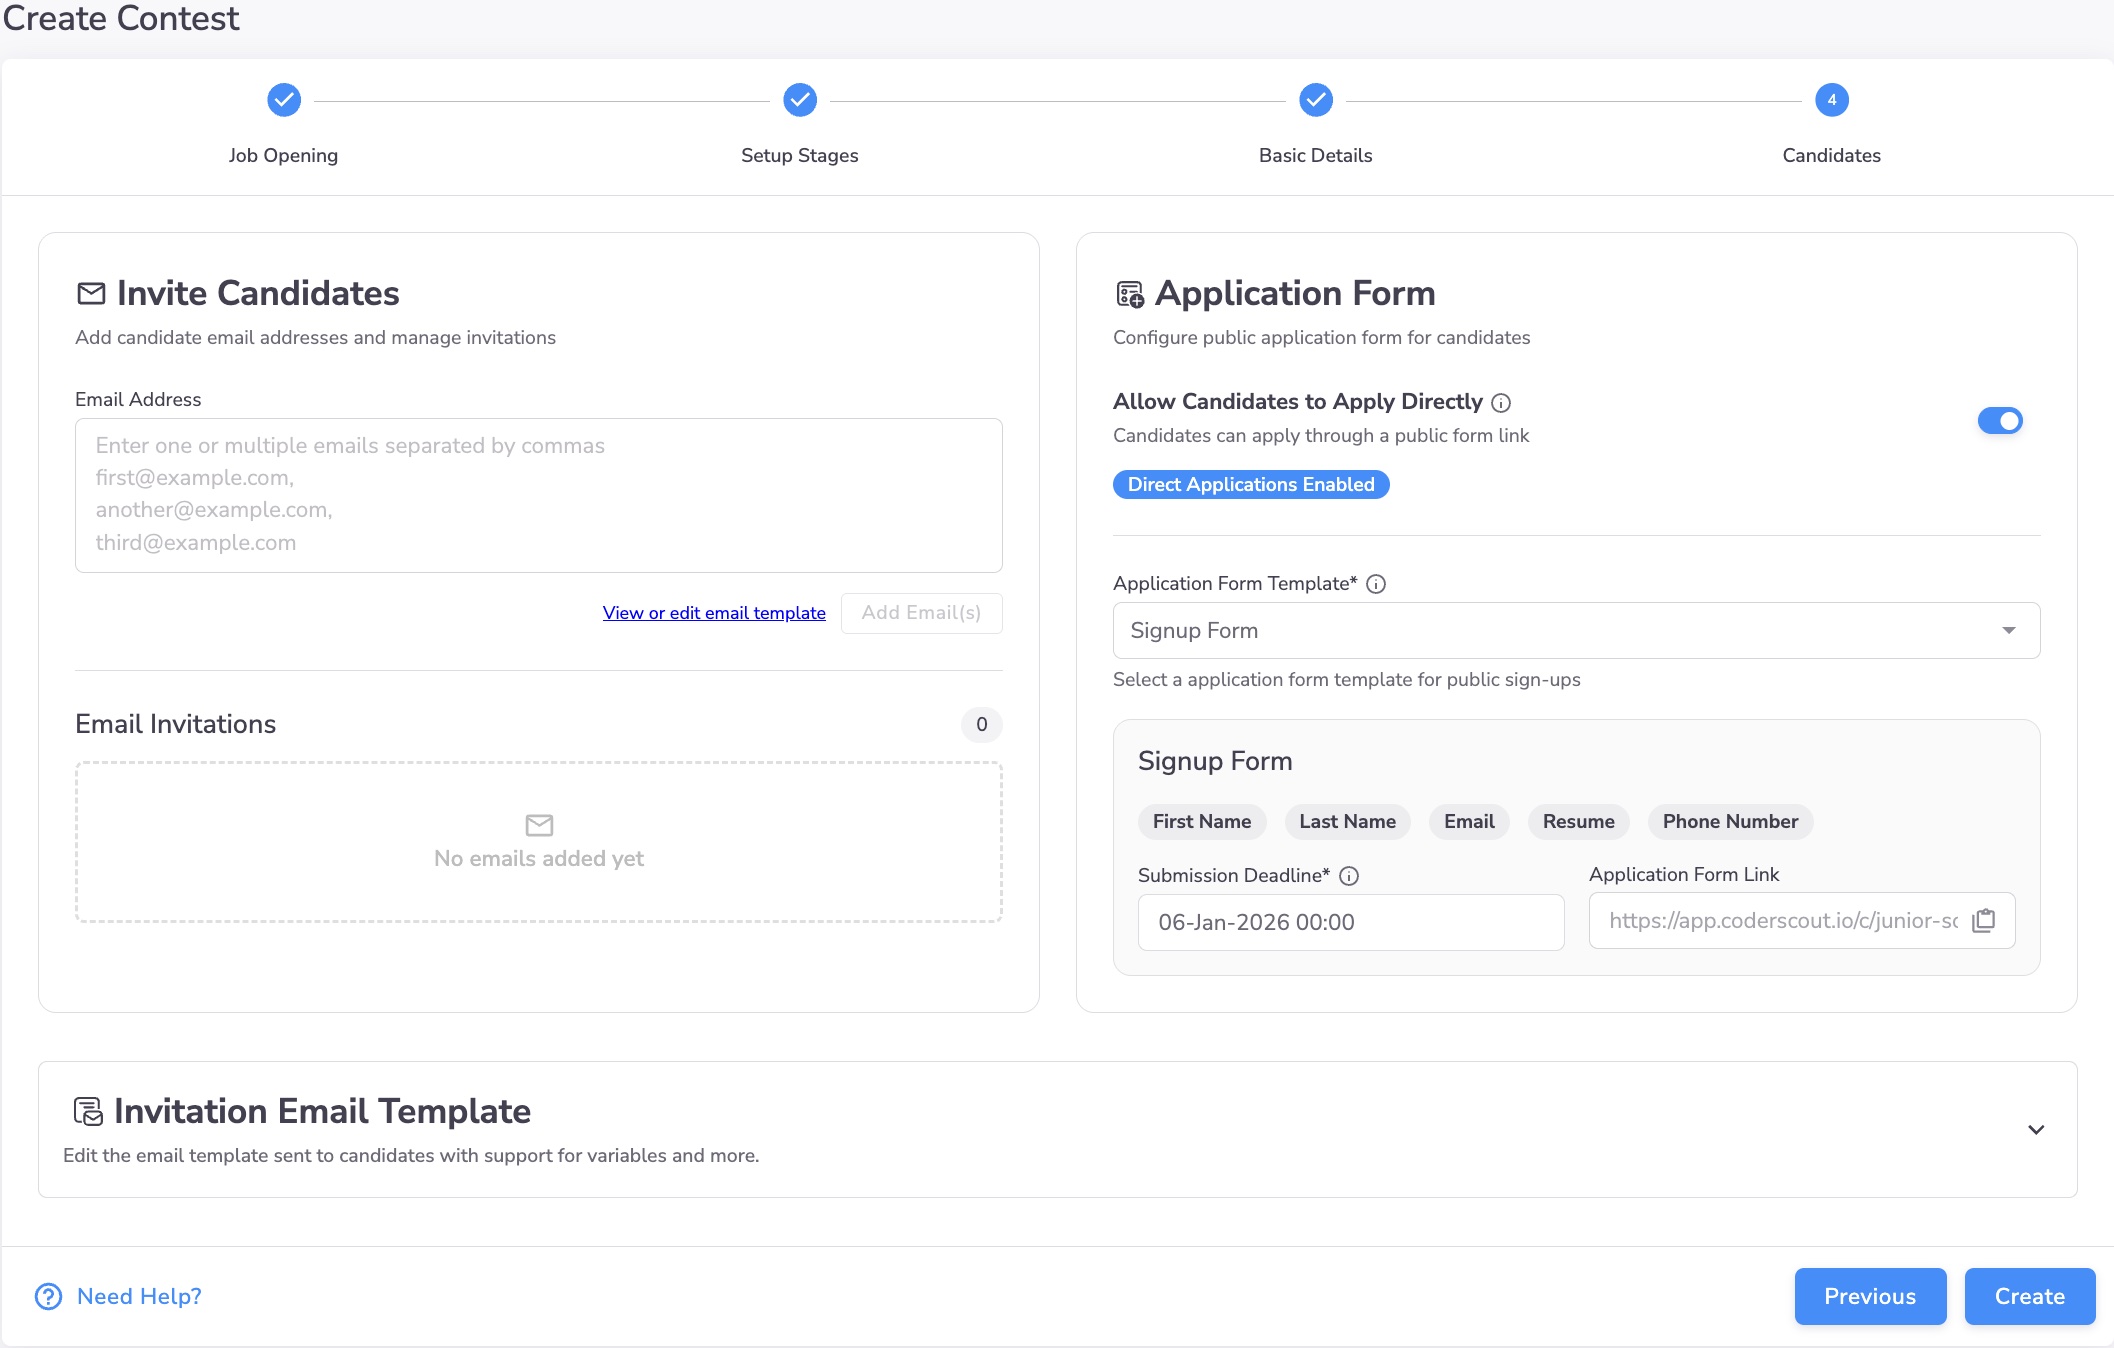
Option 1: Invite candidates directly
- Add candidate email addresses manually
- Customize and preview the invitation email
- Send invites in bulk
Option 2: Enable Direct Applications (optional)
You can also allow candidates to apply directly using a public Application Form.
When Direct Applications are enabled:
- You select an Application Form template
- A public application URL is generated
- Candidates can register themselves
Submission deadline (Contest-specific)
For Contests, you must set a Submission Deadline for the Application Form.
Important rules:
- The submission deadline must be before the Contest Start Time
- Once the deadline passes, no new registrations are accepted
This allows you to:
- Collect registrations until close to the event
- Freeze the participant list before the Contest begins
Learn more about Application Forms here:
👉 Application Forms
What happens during the Contest
Once the Contest starts:
- Stages are started simultaneously for all candidates
- Timers are global for each stage
- Results are evaluated between stages
- Qualified candidates are promoted to the next stage
- Question randomization and controls help prevent leakage
This makes Contests ideal for fair, large-scale evaluations.
When should you use a Contest vs an Assessment?
Use a Contest when:
- Many candidates participate together
- Stages must start and end at the same time
- You want strong control to prevent information leakage
Use an Assessment when:
- Candidates can take stages at their convenience
- You want automated progression with minimal supervision
- Hiring Managers review evidence before interviews
Next steps
- Learn about stage types →
Stage Types