Create an Organization Account
Who this is for
This sign-up flow is intended for organizations that want to run assessments or contests, including:
- Employers hiring for open roles
- Recruitment and staffing agencies
Candidates use a separate flow and do not create organization accounts.
Step 1: Sign up using a work email
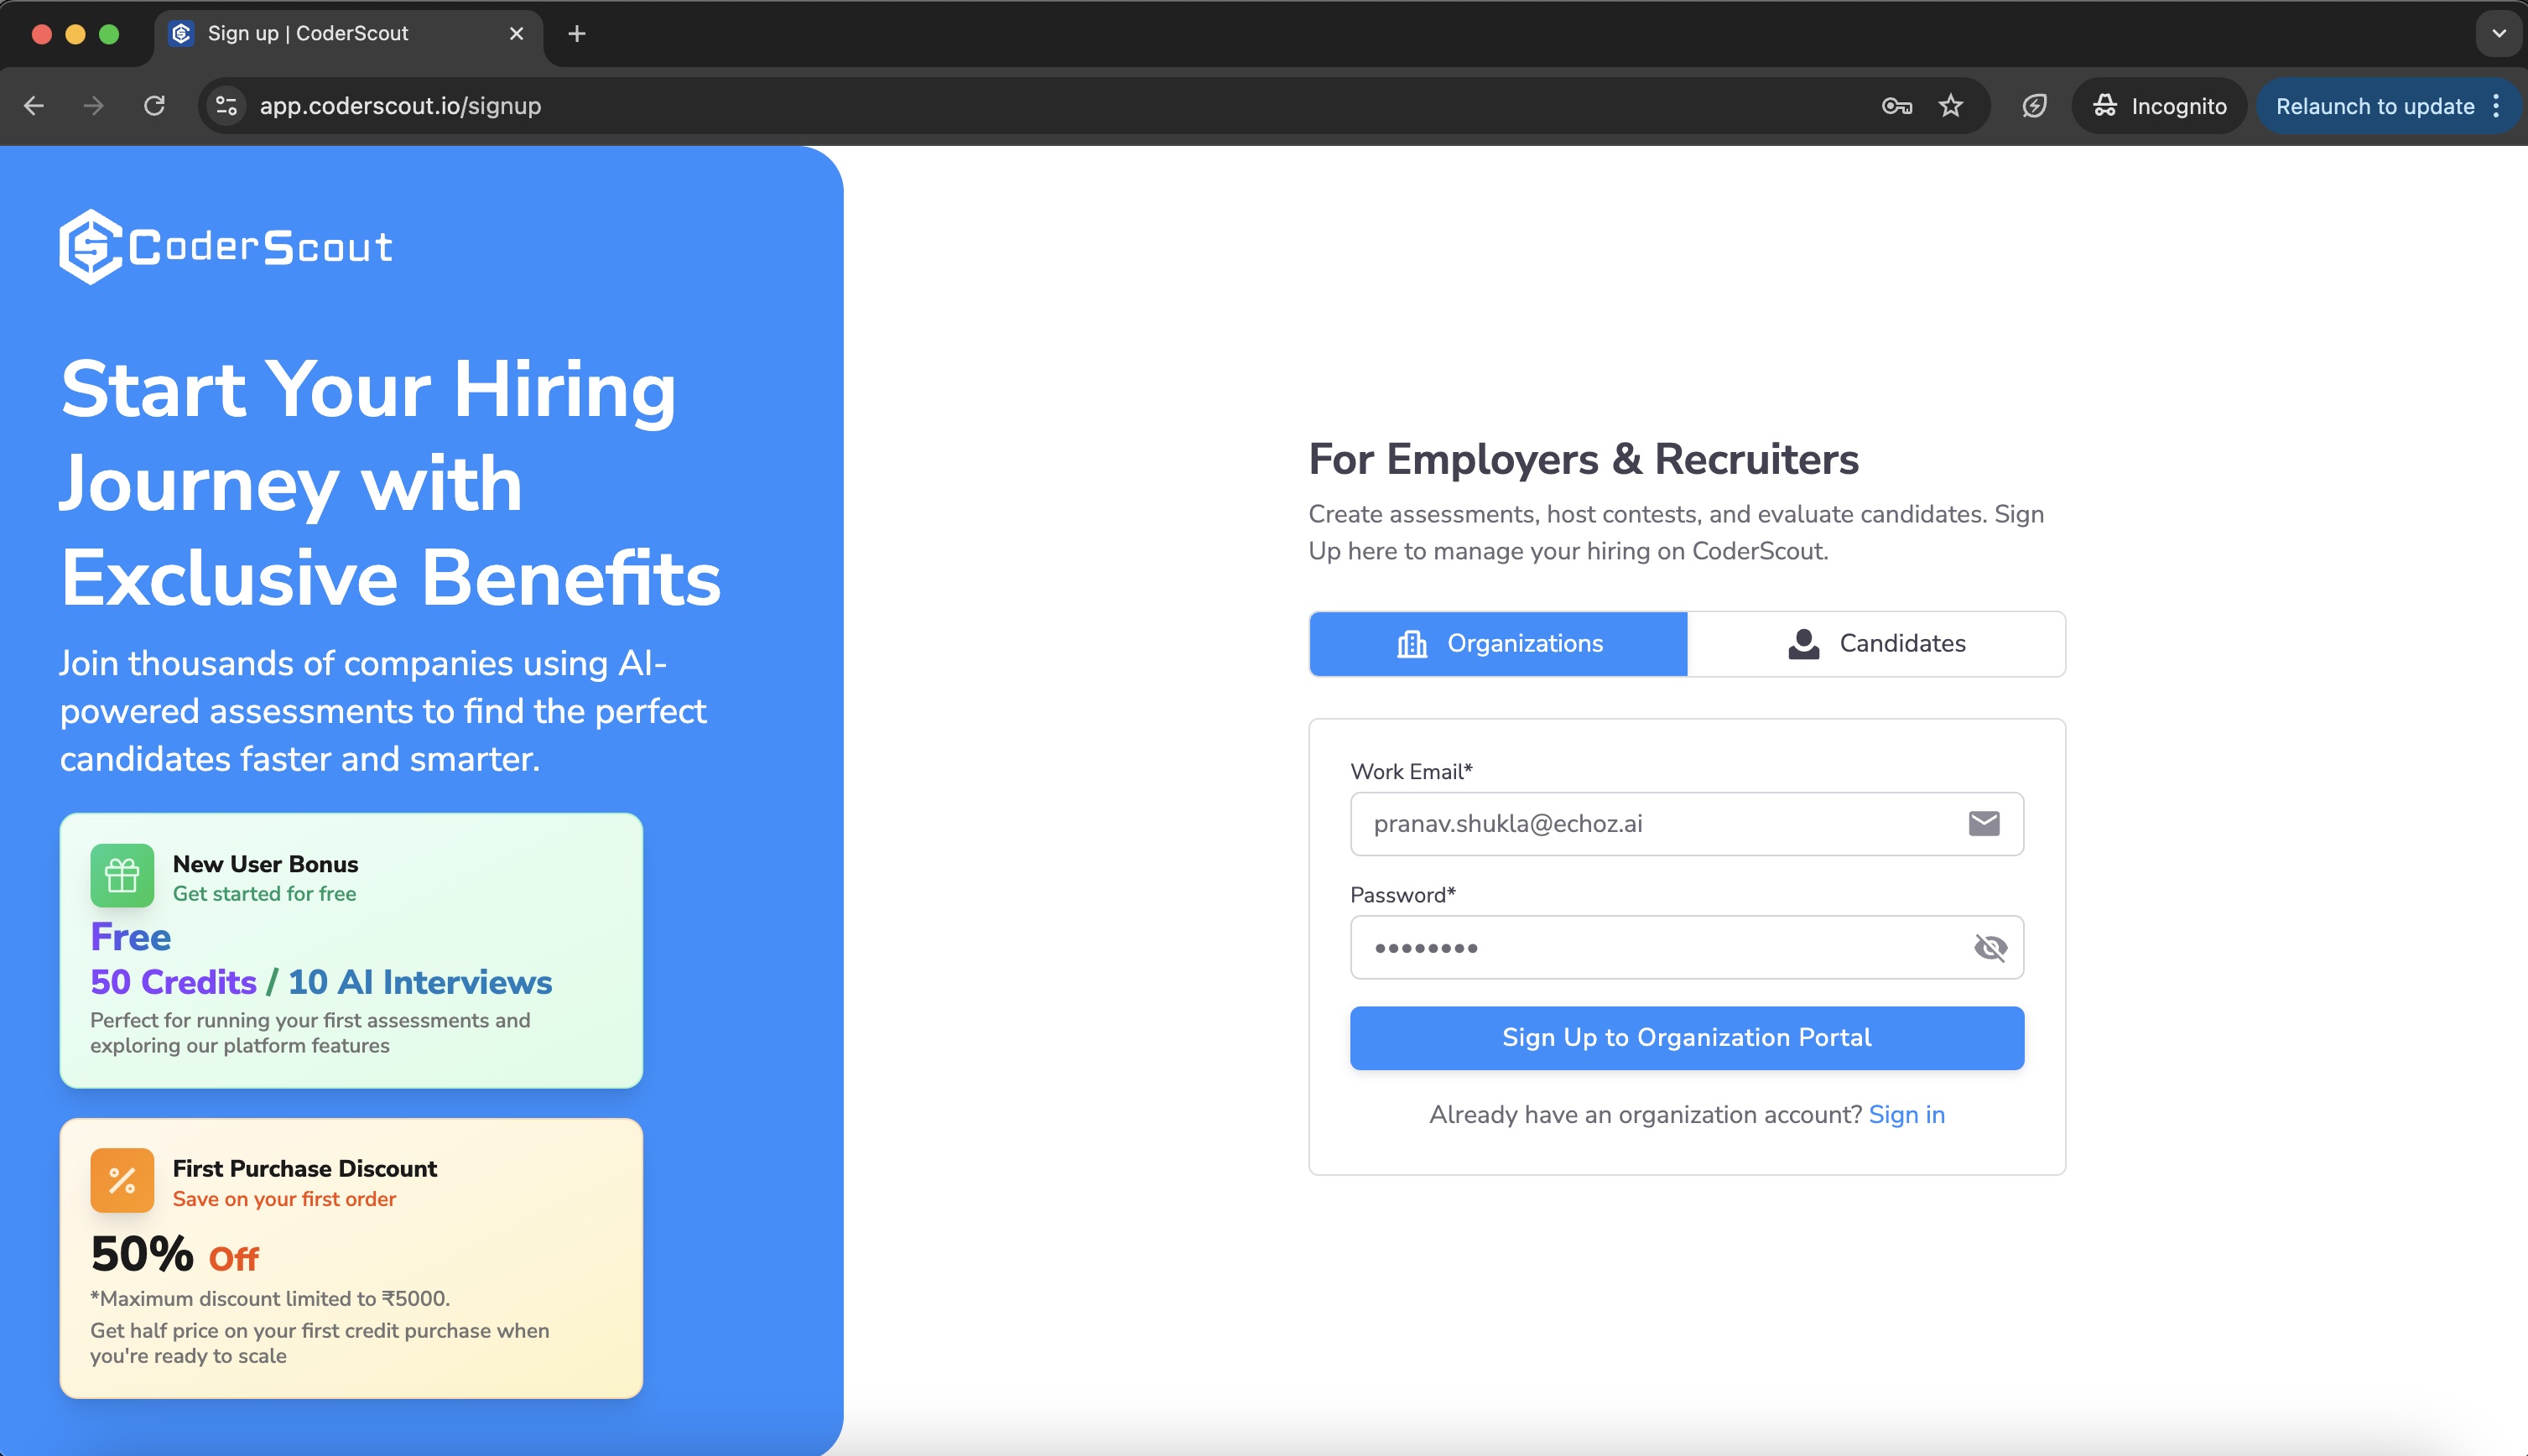
To create an organization account, visit https://app.coderscout.io/signup.
You must sign up using your official work email address. Personal email addresses will not work.
You will see the sign-up page similar to the one shown below:
Step 2: Verify your email
After submitting the sign-up form:
- You will receive a verification email
- Click the verification link
- Once verified, you can log in to CoderScout
Email verification is mandatory to activate your account.
Step 3: Complete your organization profile
After your first login, you will be prompted to complete your Organization Profile.
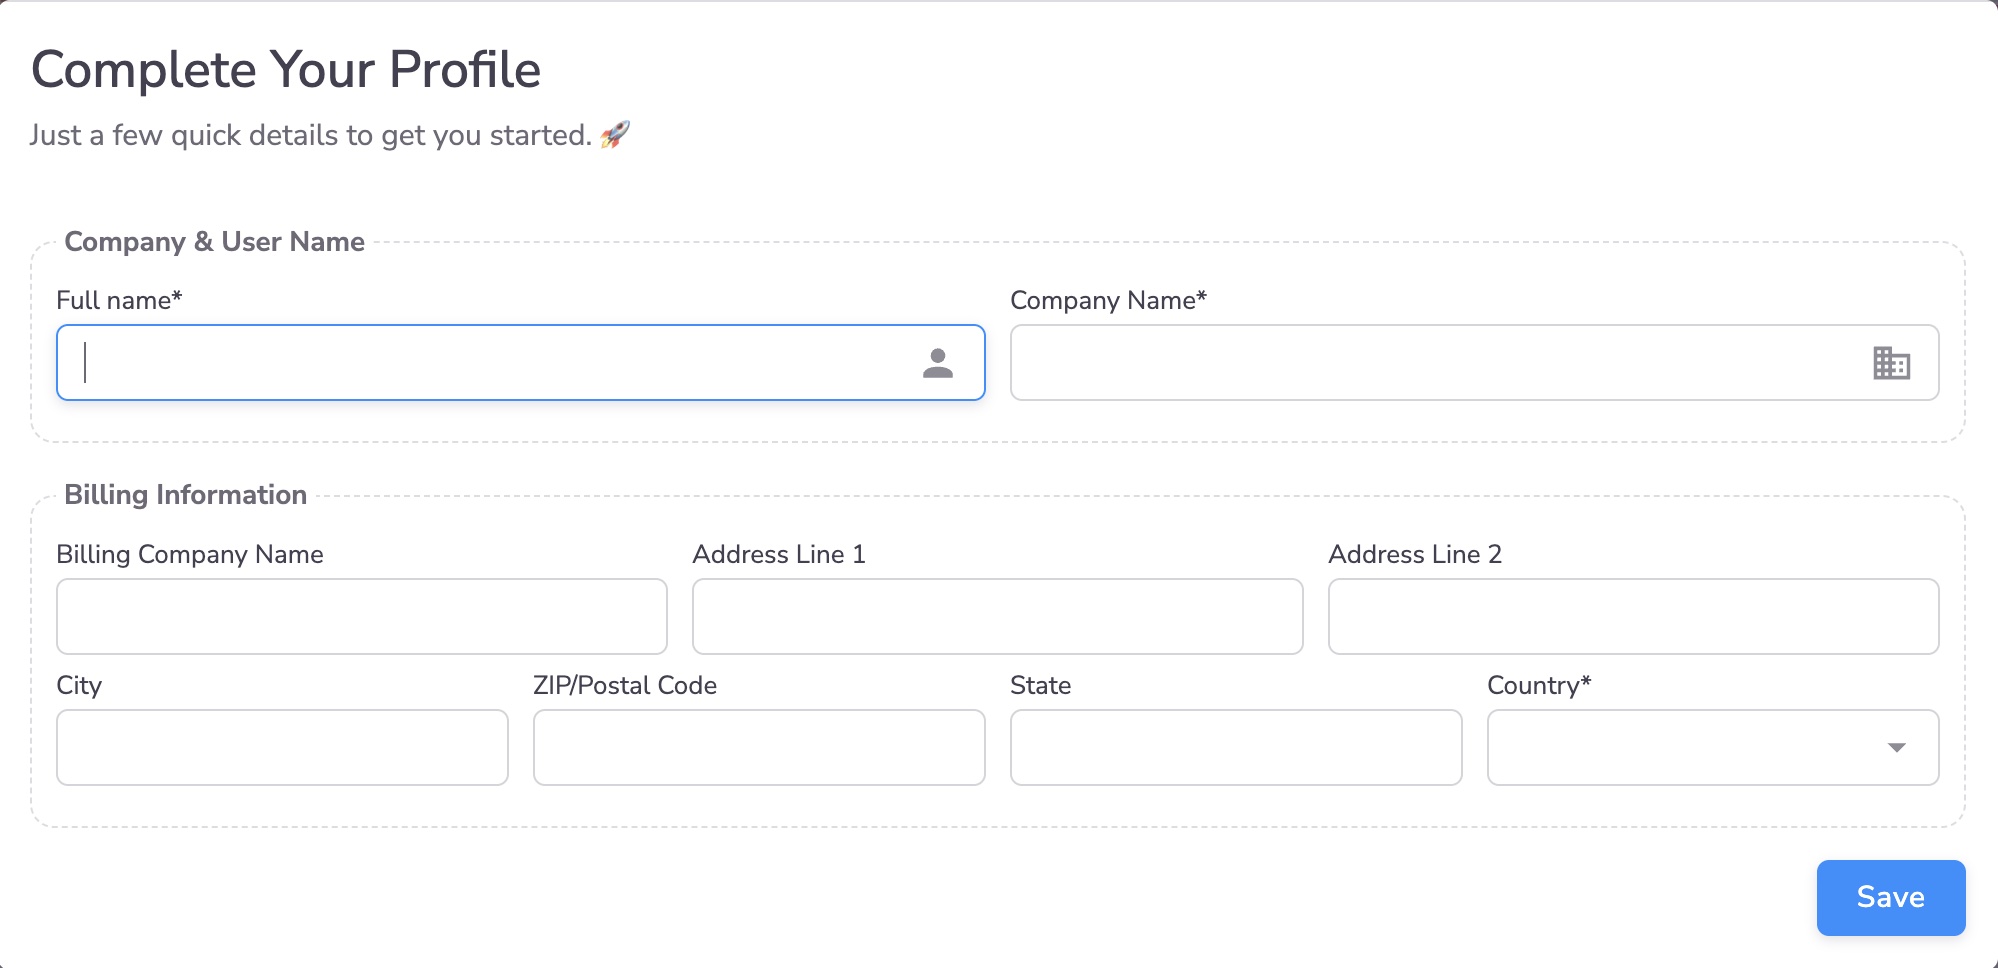
Company & User Information
The person who creates the account becomes the organization's main contact.
-
Full Name (mandatory)
Your name as a user in the system -
Company Name (mandatory)
This is the organization name visible to candidates when they are invited to participate in Assessments or Contests
Billing Information
CoderScout uses a credit-based pricing model. Credits are consumed when you run assessments and contests. Billing details collected here ensure your account is ready to use from the start.
-
Billing Company Name (optional)
Can be the same as or different from the Company Name
This name appears on invoices and billing records -
Country (mandatory)
Determines:- Currency used for credit purchases
- Currency used for subscriptions
- Invoice currency
All other billing fields are optional and can be updated later from your billing settings.
If your billing company is based in India, you can optionally provide your GSTIN to receive GST invoices for all payments. This can also be added or updated later from your billing settings.
Important distinction: Company Name vs Billing Company Name
-
Company Name
- Candidate-facing identity
- Shown in invites, contests, and assessments
-
Billing Company Name
- Used only for invoices and payments
- Can be a parent company or legal entity
After onboarding
Once onboarding is complete, you can:
- Create Assessments and Contests
- Invite candidates or accept direct applications
- Invite internal team members
- Configure stages and workflows
Next steps
- Understand user roles →
Roles & Permissions - Create your first assessment →
First Assessment